


If you were paying close attention, you may have noticed that Apple announced a new mobile video creation app called Clips alongside its quiet launch of the 2017 iPad. What exactly does Clips do, and how does it work? We went hands on to help you get up and running.
The Clips app creates short videos/animations by combining your pictures, videos and captions with text, graphics, filters, emojis and music. If you've ever seen a Snapchat-generated "Story", or any of its numerous recent copycats from the likes of Instagram and Facebook Messenger, Clips videos will look familiar.
When it comes to actually creating the stories, however, Clips is more complicated to use than those social media-based options. It's also more powerful: Think of it as Snapchat-meets-iMovie, designed for your mobile device. If you're unfamiliar with either app, prepare for a bit of learning curve with Clips.
How to get started
To get started, download, install and open the app. (Note: Clips is a strictly mobile app that requires iOS 10.3, so you may need a software update before proceeding). The first time you use it, you'll see a short welcome video.
After that, you'll see a capture screen where you can select Photo, Video or Library. This is where you're choosing individual clips that will make up your video project. The Photo option captures still images in-app, while Video records (you guessed it) video. Choose Library to choose content from your camera roll.
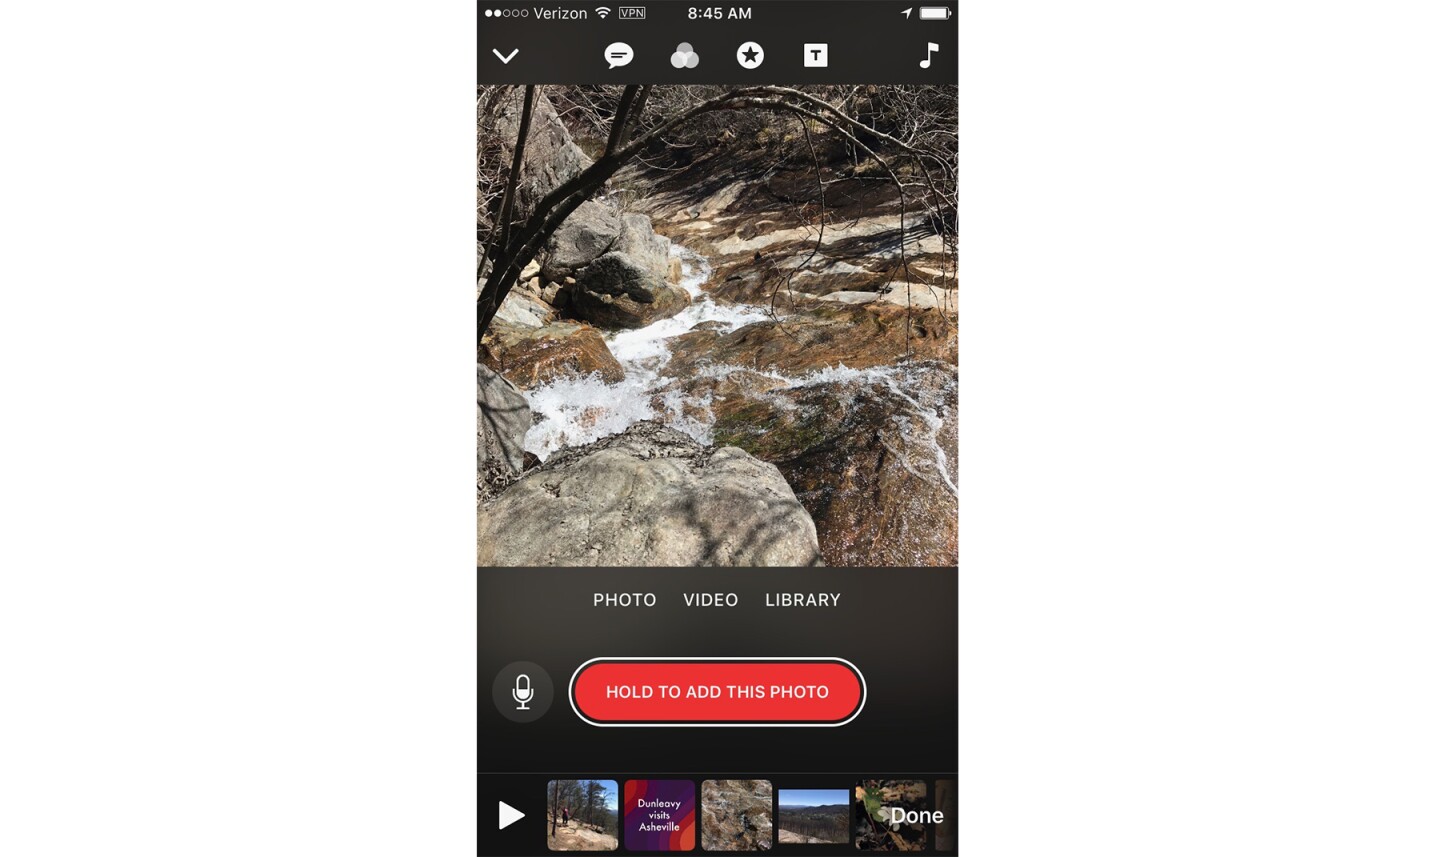
After you've selected a photo or video you'd like to use, toggle the microphone option on or off depending on whether or not you'd like to include audio in your recording. When you're ready to add a clip, hold down the "Hold to Record" or "Hold to add this photo" button. Your holding/recording time is equal to playback time. If you'd like a still image to be displayed for five seconds, for example, hold down the recording button for five seconds.
Once you've recorded a clip, you'll see it appear in the film strip-like carousel at the bottom of the screen. Now you're ready to add more clips, or add effects like filters, text and music.
Voice-to-text-captions
The "Speak while recording" feature, represented by the speech bubble icon at the top of the screen, records and transcribes your voice over a clip. It adds your narration to the clip, along with automatically generated captions of what you're saying – Apple calls them "Live Titles".
This feature is one of the most unique parts of the app, but it's also one of the most finicky. We had to try it a few times to get it right, and even then, we found that you need to speak slowly and somewhat robotically in order to get the voice transcription to be accurate – and disjointed, unnatural speaking isn't exactly what you'd want in a narration over a video.
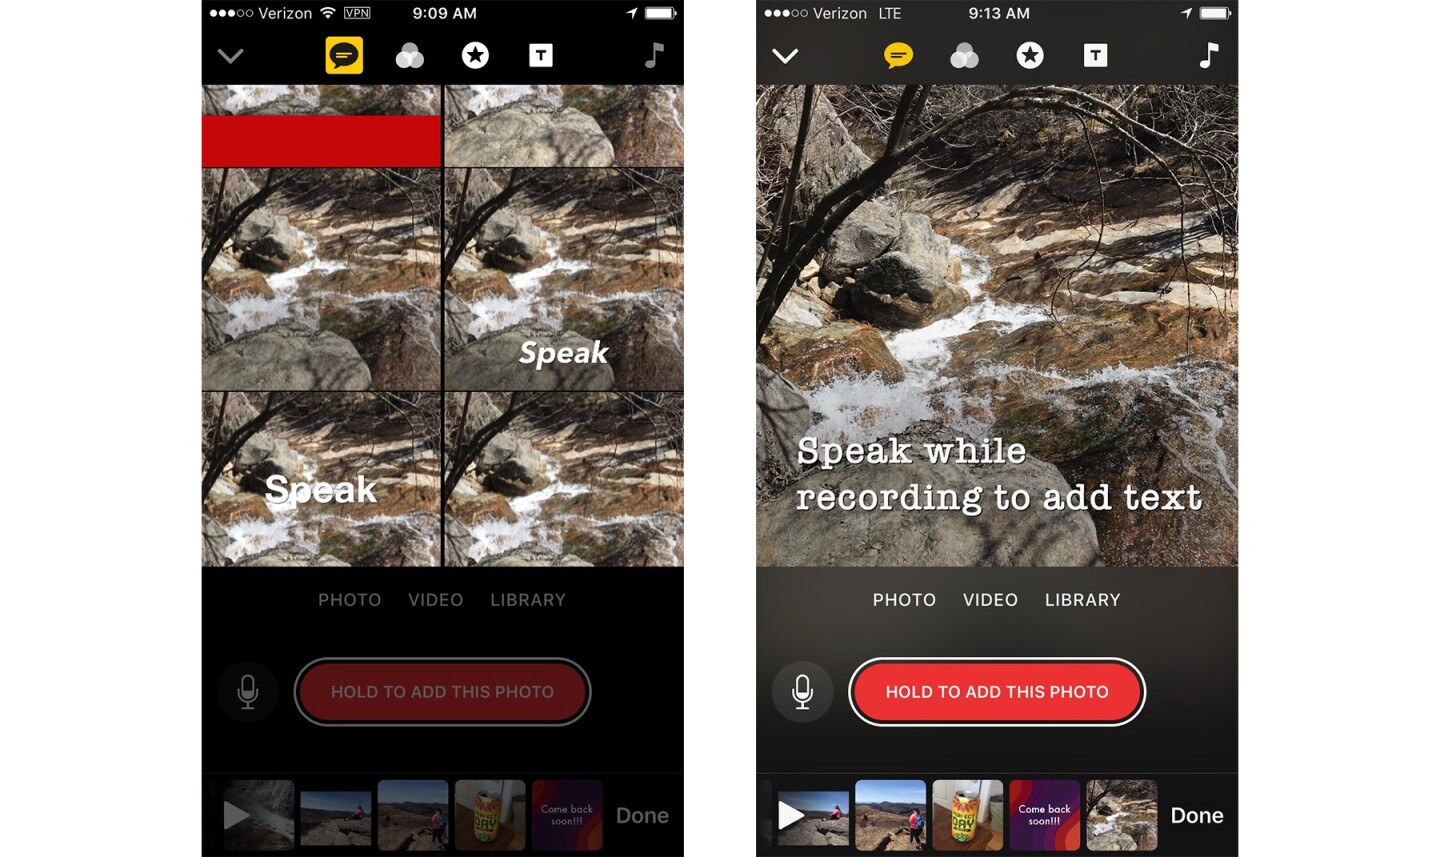
Nevertheless, it's worth some experimentation. To add Live Titles, you'll have to speak while recording a clip. (You can't add them to a clip you've already recorded.) So navigate to the capture screen, select your photo or video option of choice, and tap the chat bubble icon to turn on Speak while recording. From there, you have several options for text placement and style – pick one.
When you're ready, press and hold record. Speak slowly and clearly, and you'll see the transcription appear on the display before you. Be sure to hold the record button for a second or two after you've finished speaking, or the app may not capture your voice-to-text.
After you release the record button, you'll see your clip added to the film strip at the bottom of the screen.
Filters
The Filters option (accessible via the three overlapping circles icon) adds style filters. You can filter as you record, or you can add/change them after the fact. You can filter all of your photos and video clips the same way, or you can choose different ones for each.
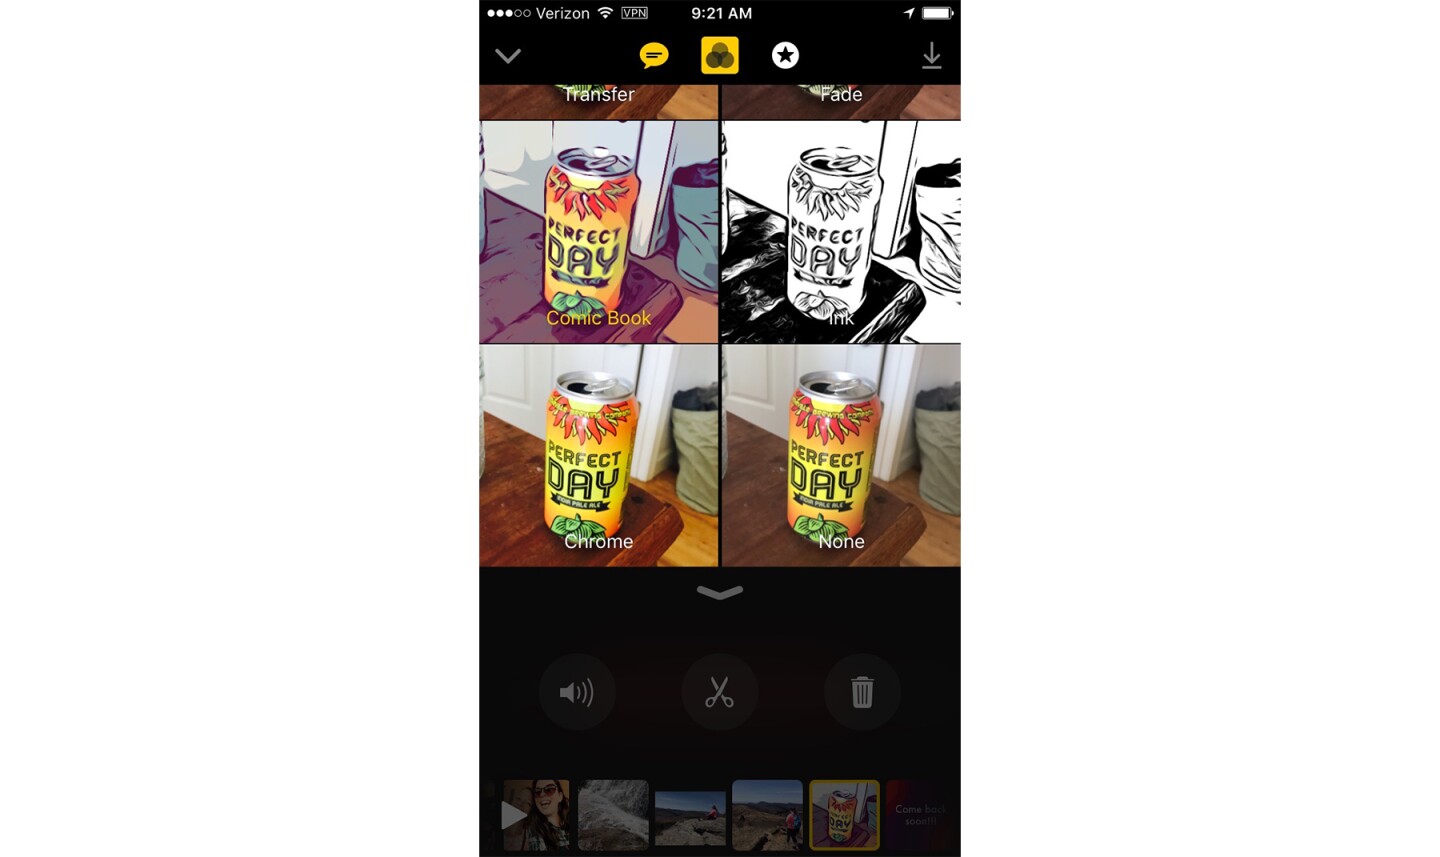
To add a filter as you record, tap the Filters icon and choose your desired effect, then record your photo or video.
To add a filter to a clip you've already recorded, locate the clip in the film strip at the bottom of the screen. Light tap the clip to access editing options, then tap the Filters icon to view your options.
Adding text and emojis
There are two ways to add text to your video. You can either type in captions that overlay over individual clips, or you can add title screens in between clips that display only your stylized text of choice.
Overlay options are accessed via the star icon at the top of the screen. Tap the star to select a text style. Or, if you swipe left, you'll see that there are several emoji options you can overlay as well.
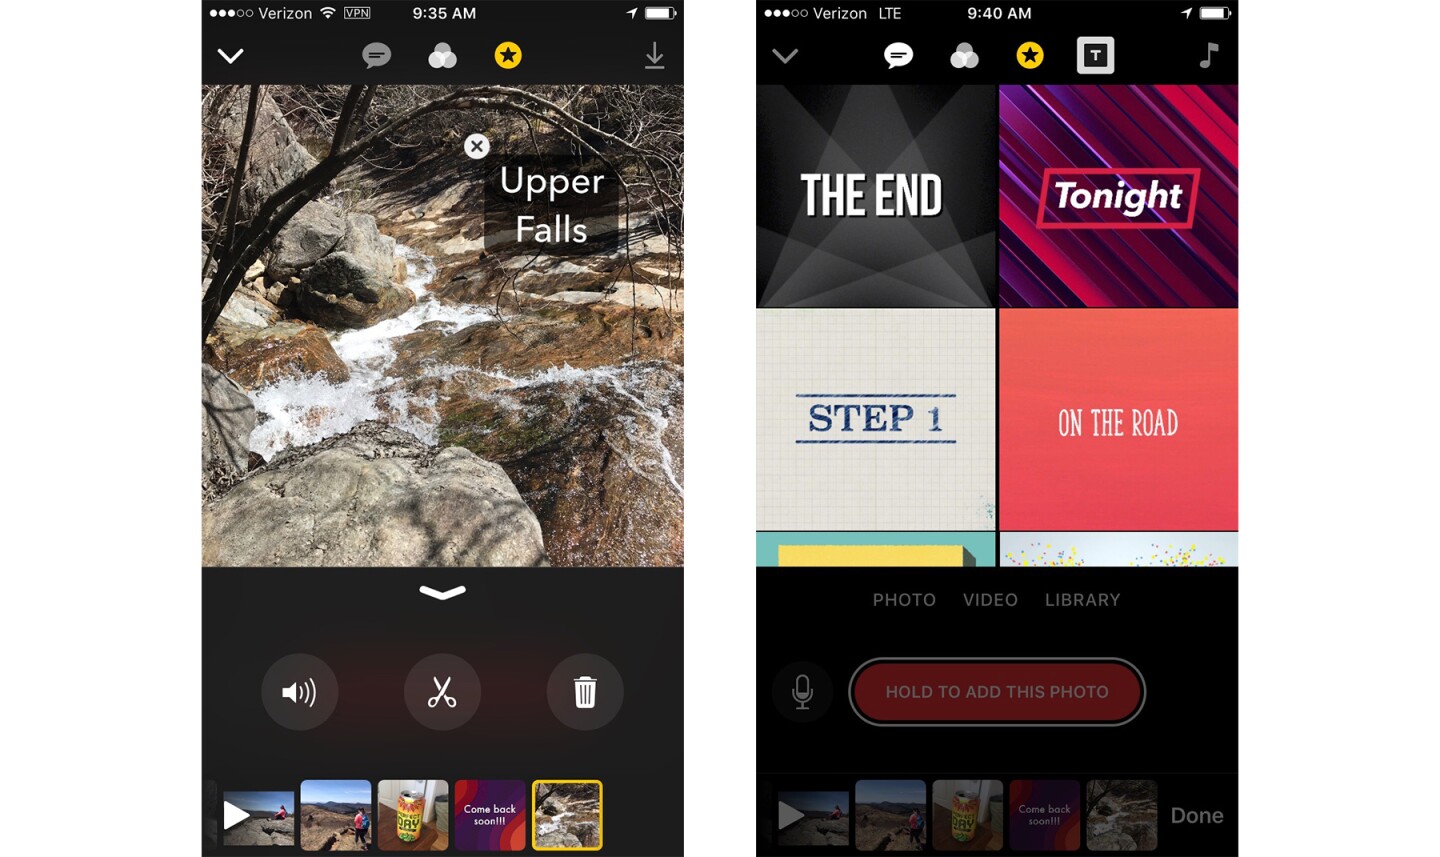
Once you make a selection, you can enter your own text, and resize/reposition it over the clip as needed. Once the text or emoji is displayed on your clip, pinch to shrink it or expand. With a light press and drag, you can reposition and rotate the item. A longer, deeper press lets you access the text to edit it. Or, click the X in the corner to remove the overlay.
You can also add a text-only title screen in between photo and video clips. You'll need to do this from the capture screen: Select the T icon from the top right corner. Choose the screen style you'd like (this may require a free download, if you haven't already used that style before). Once you select the style, double tap the text to make changes. From there, hit record to add your title screen to your video.
Rearranging, editing and deleting individual clips
Once you've decided on all the content for your video, look to the film strip carousel at the bottom of the screen to make any necessary edits.
You can light tap on any individual clip to make changes to it. There, you'll see sound, scissors and trash can icons. The sound icon mutes or un-mutes the clip, the scissors icon lets you adjust the length of the clip, and the trash icon deletes it. You can also access sound-to-text, filter and overlay options at the top of the screen. Or, press the downward arrow to leave the edit screen.
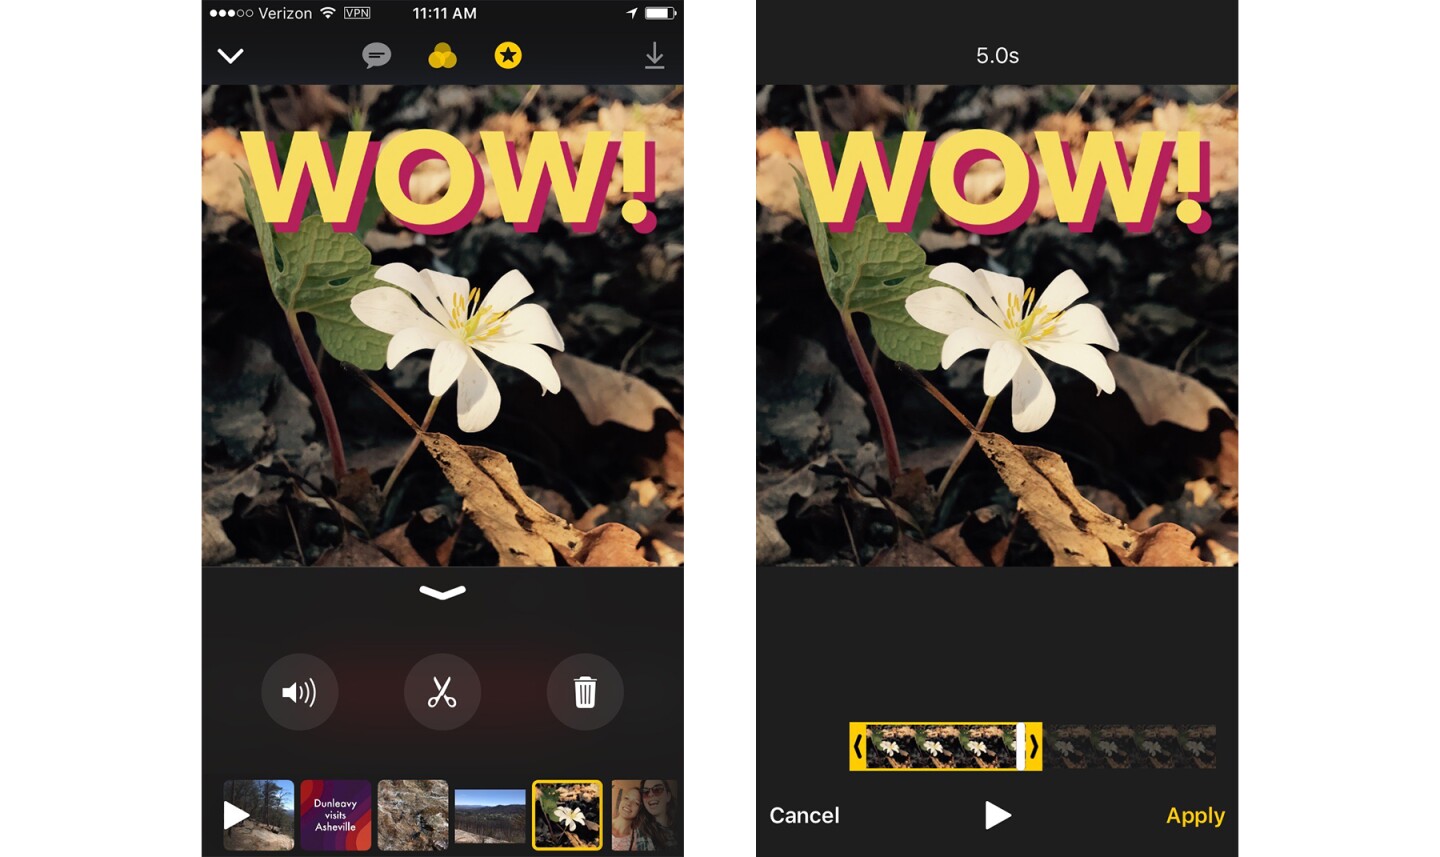
If you tap the scissors, you'll see trimming options very similar-looking to those in iMovie. Drag the arrows at either end of the clip to shorten it or lengthen it. When you're satisfied, hit Apply.
To rearrange clips, light tap and drag clips to their desired order. Note that you can preview your video at any time by clicking the play button at the bottom of the screen.
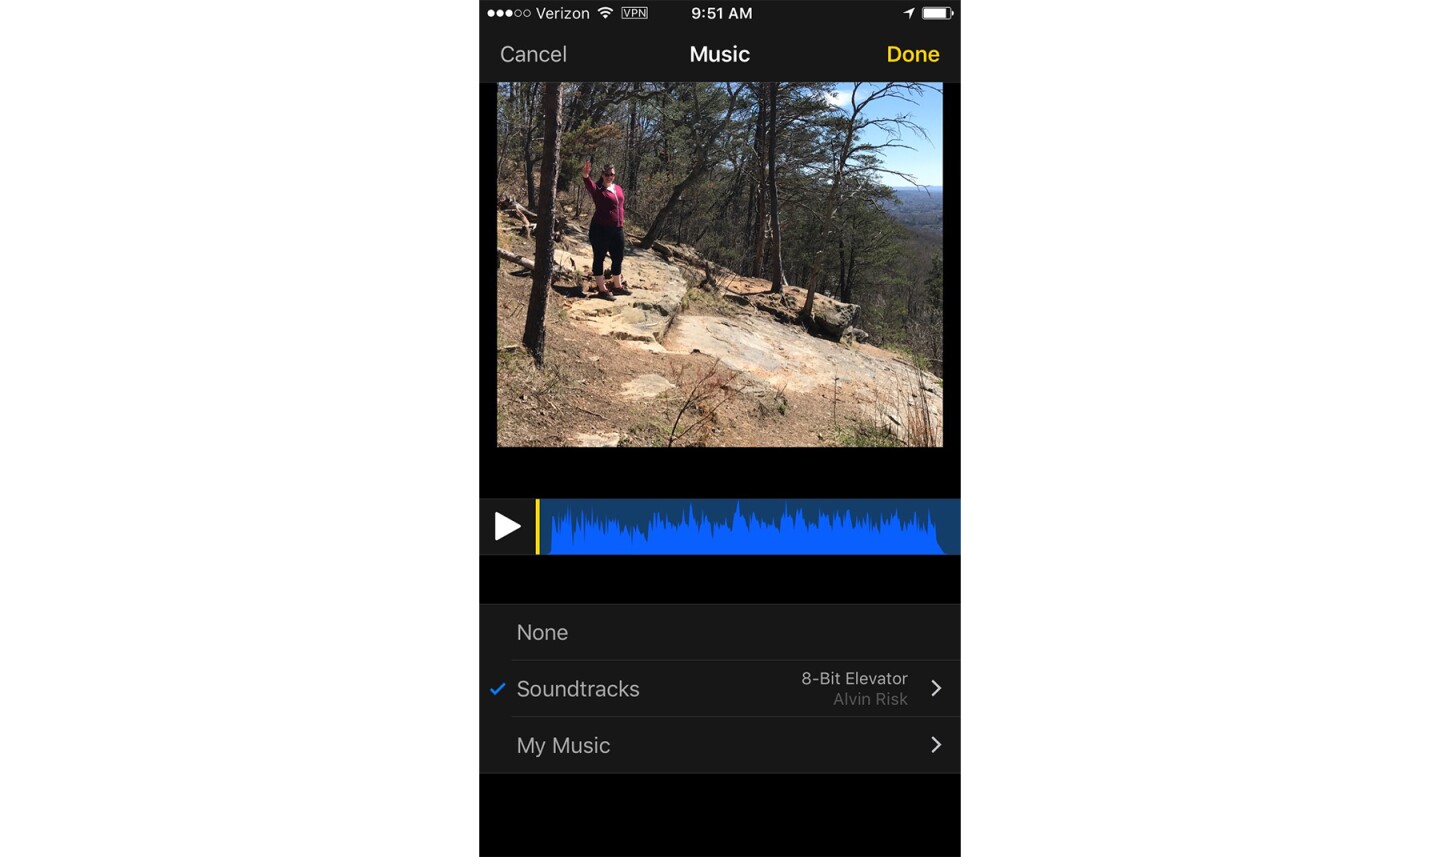
Adding music
To add music over your video, return to the capture screen and hit the music note icon in the upper right corner. You can download one of the free instrumental tracks that Apple included with the app, or you can access your iTunes library under My Music. Hit "Done" when you're ready.
Saving & sharing
Once you've finished your first project, it's time to save and share it. Hit the arrow icon in the top left of the screen to view your projects.
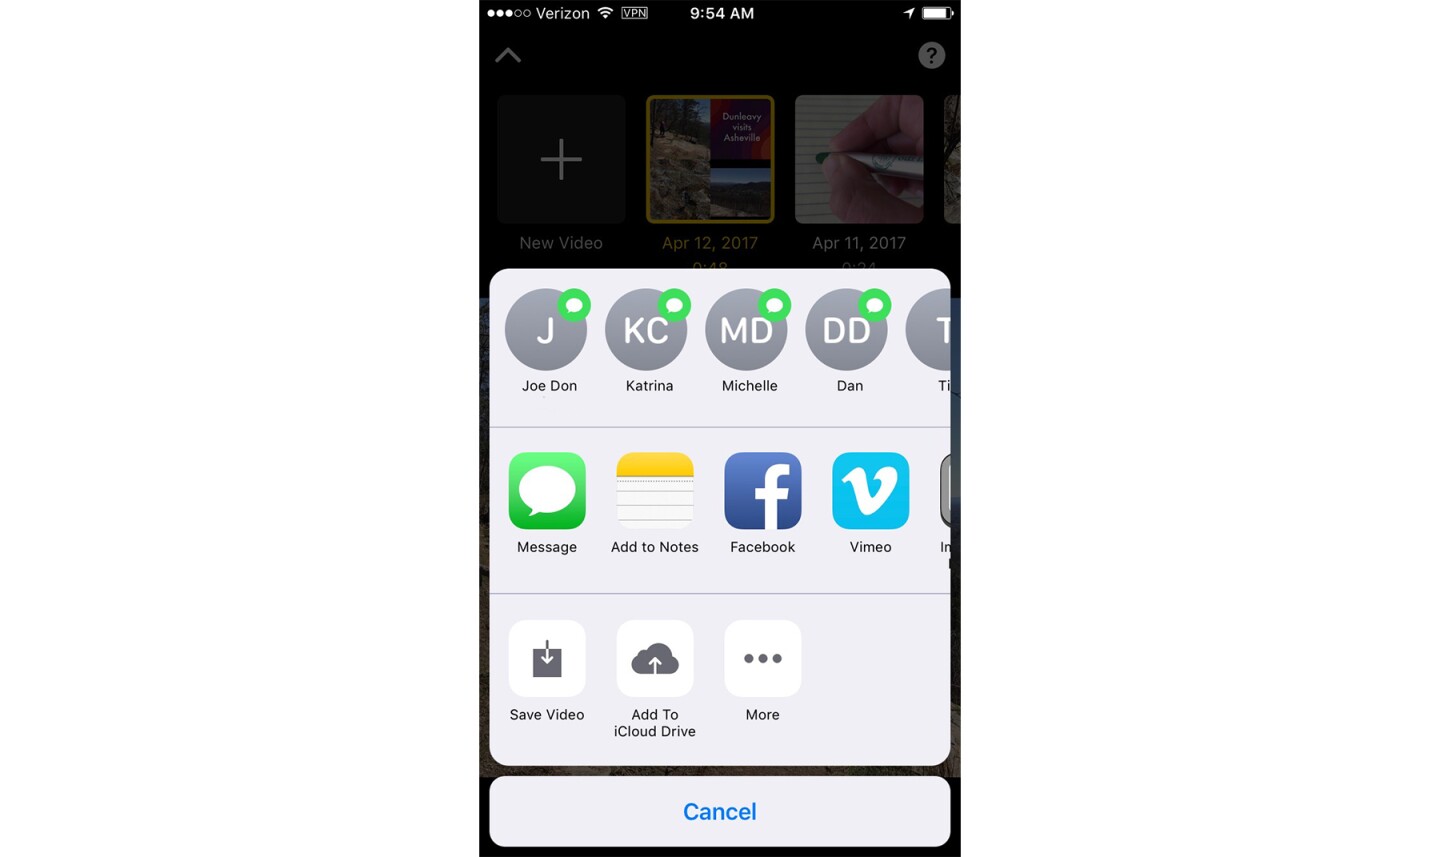
Select a project and hit the share icon in the lower right hand corner to view your options. You'll see several options, including saving video to your device, messaging it directly to one of your recent contacts, or exporting it to one of your other apps.
A hit or a miss?
As you may be able to tell from these instructions, Clips isn't the most easy-to-use app. While experienced Snapchat and iMovie users will have an easier time, the app has many ins-and-outs that still demand a learning curve.
That being said, Clips has some clear benefits. For example, unlike many social media apps, you can save and share videos whichever way you'd like – you don't need to post them in order to save them to your device. There are also more powerful editing options, which you can access even after you've shared your video. Clips videos may be up to one hour long.
Overall, Clips is a very capable standalone video creation tool. While not everyone may find it particularly useful or easy to use, it's the kind of app that helps smartphones take the place of other devices: An iPhone with Clips is a more accessible mobile video creation tool than a more involved app like iMovie.
Clips is free in the App Store, but is currently available in the US only and is not supported on Android devices.
If you're into Apple and/or graphics creation, you may also enjoy these articles from New Atlas:


