


Many iPhone users have wrestled with storage limits, especially when it comes to managing the device's camera roll. Apart from deleting old pics and purchasing a paid iCloud subscription, there's another option for alleviating storage woes: using Google Photos for iOS.
Below, we provide instructions for backing up all of the photos on your phone to Google Drive via the Google Photos for iOS app, so you can delete them from your phone (and the iCloud) as needed.
Download & install the app
The Google Photos for iOS app is free. Download and install the app on your iPhone or iPad. When you launch it for the first time, you'll be asked to sign into your Google account.
If you've used any other Google services, including Gmail, use the same credentials. If you have more than one Google account, choose carefully. Make sure you're selecting the account you want to associate your photo library with for the long term.
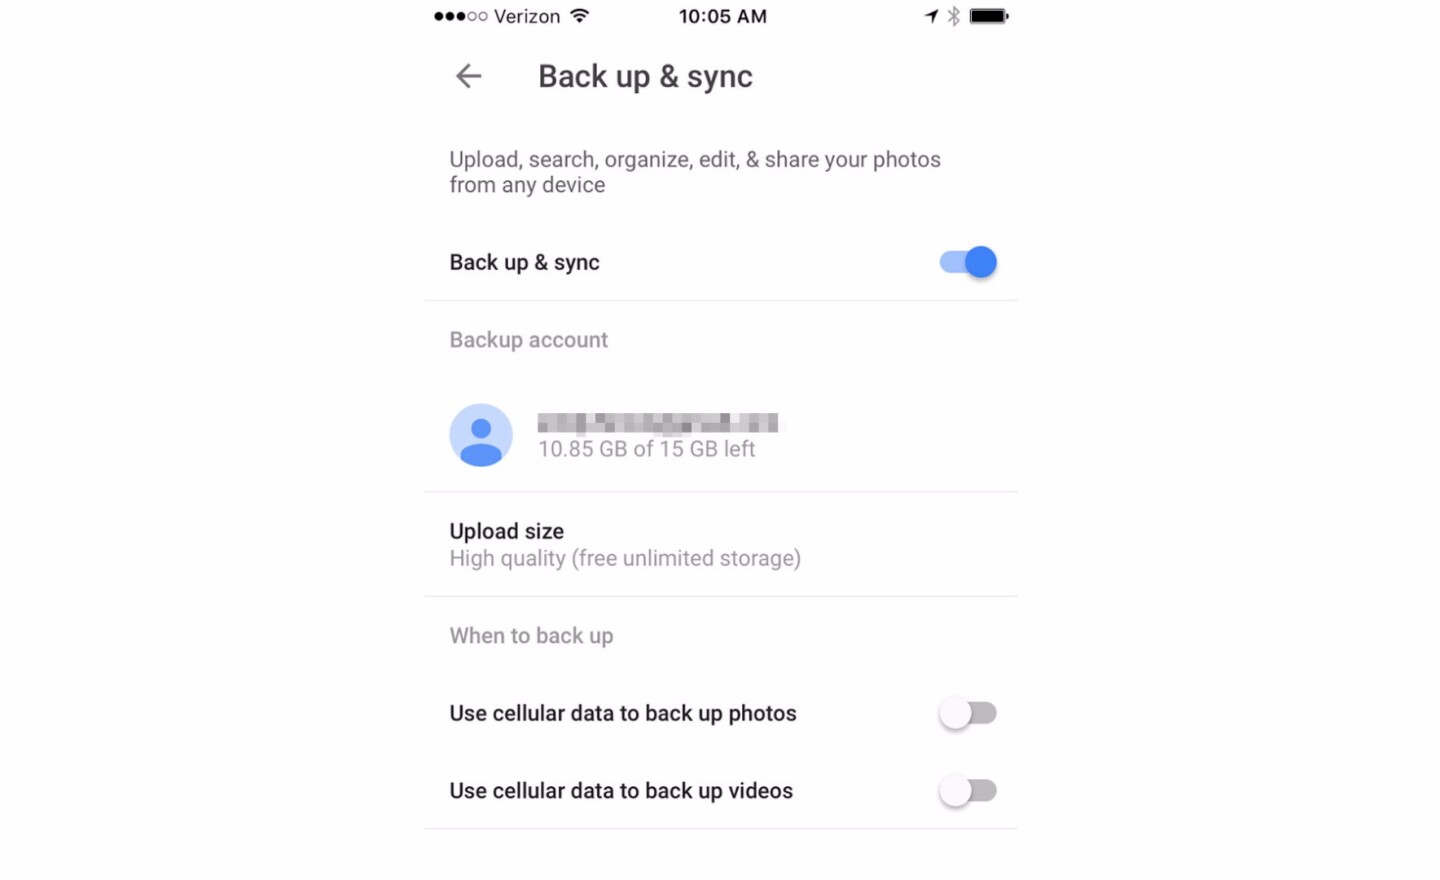
Back up & sync for the first time
Next, you'll encounter the Back up & sync screen. Here, you'll set your preferences for how the photos saved on your device should be uploaded to the Google Drive cloud. The app walks you through the steps.
Here, switch the "Back up & sync" toggle to the blue on position. Whether you wish to enable cellular data for this sync and future syncing is up to you, but we recommend leaving it off (assuming you have access to a Wi-Fi network) so you don't inadvertently put a strain on your data plan. You can always change this and other settings later. Hit Continue.
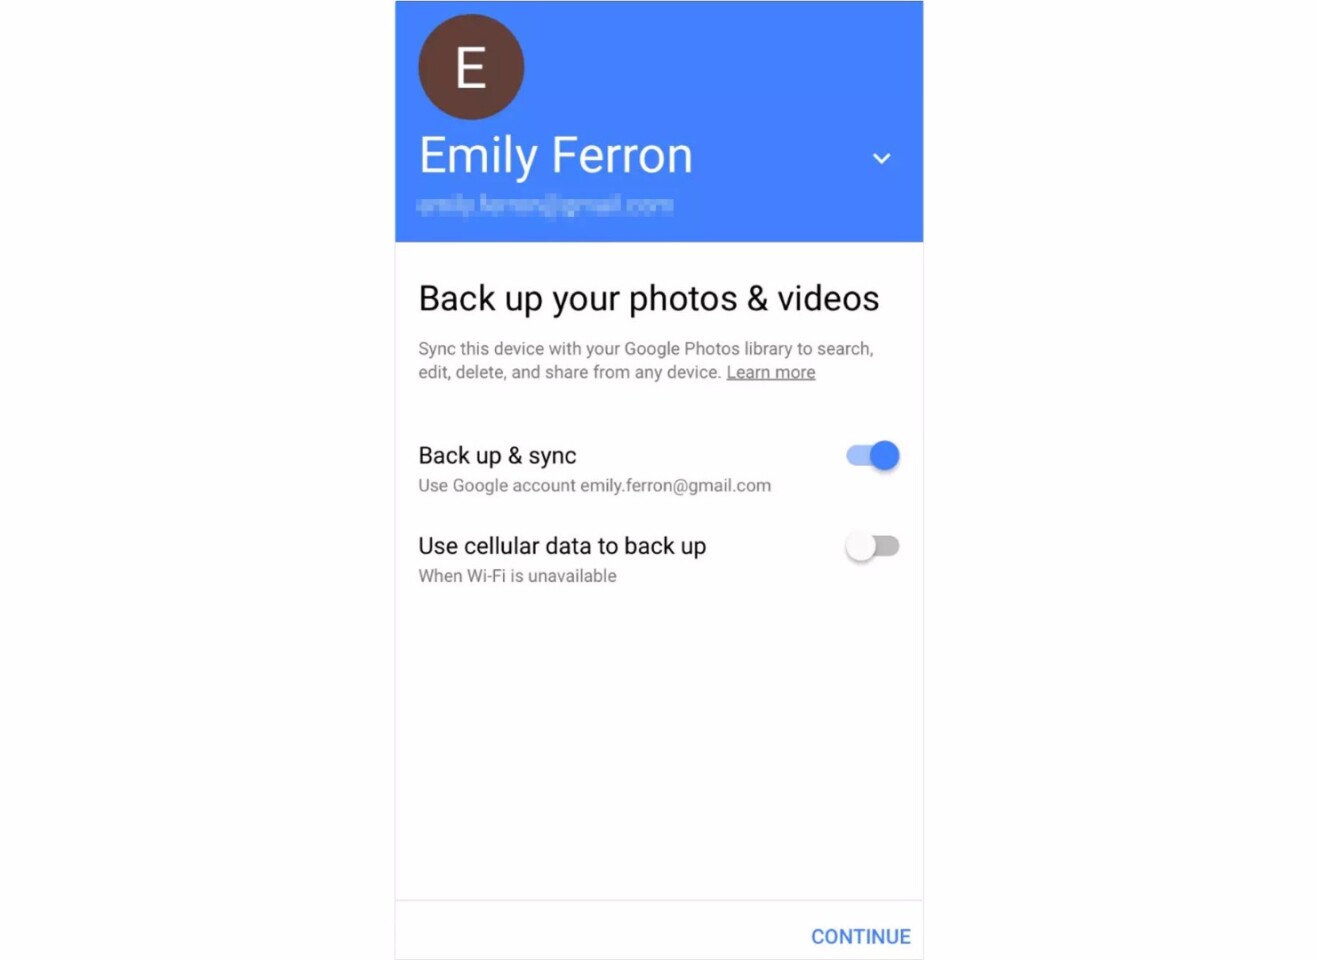
The next screen asks you to confirm upload size. Here, you should choose "High Quality" for two reasons. One, photos uploaded at this size do not count against the 15 GB of free Google Drive storage associated with your Google Account. Two, it won't affect the quality of the photos you've taken on your iPhone: The high quality option compresses photos to a 16 MP maximum, but at this point, all iPhones already take photos at 16 MP or smaller.
Once you hit continue, the back up & sync process begins (presuming you are on a Wi-Fi network or using cellular data). The more photos you have, the longer this automated process will take, so don't be worried if it takes a while to finish up.
Confirm uploads, explore Google Photos
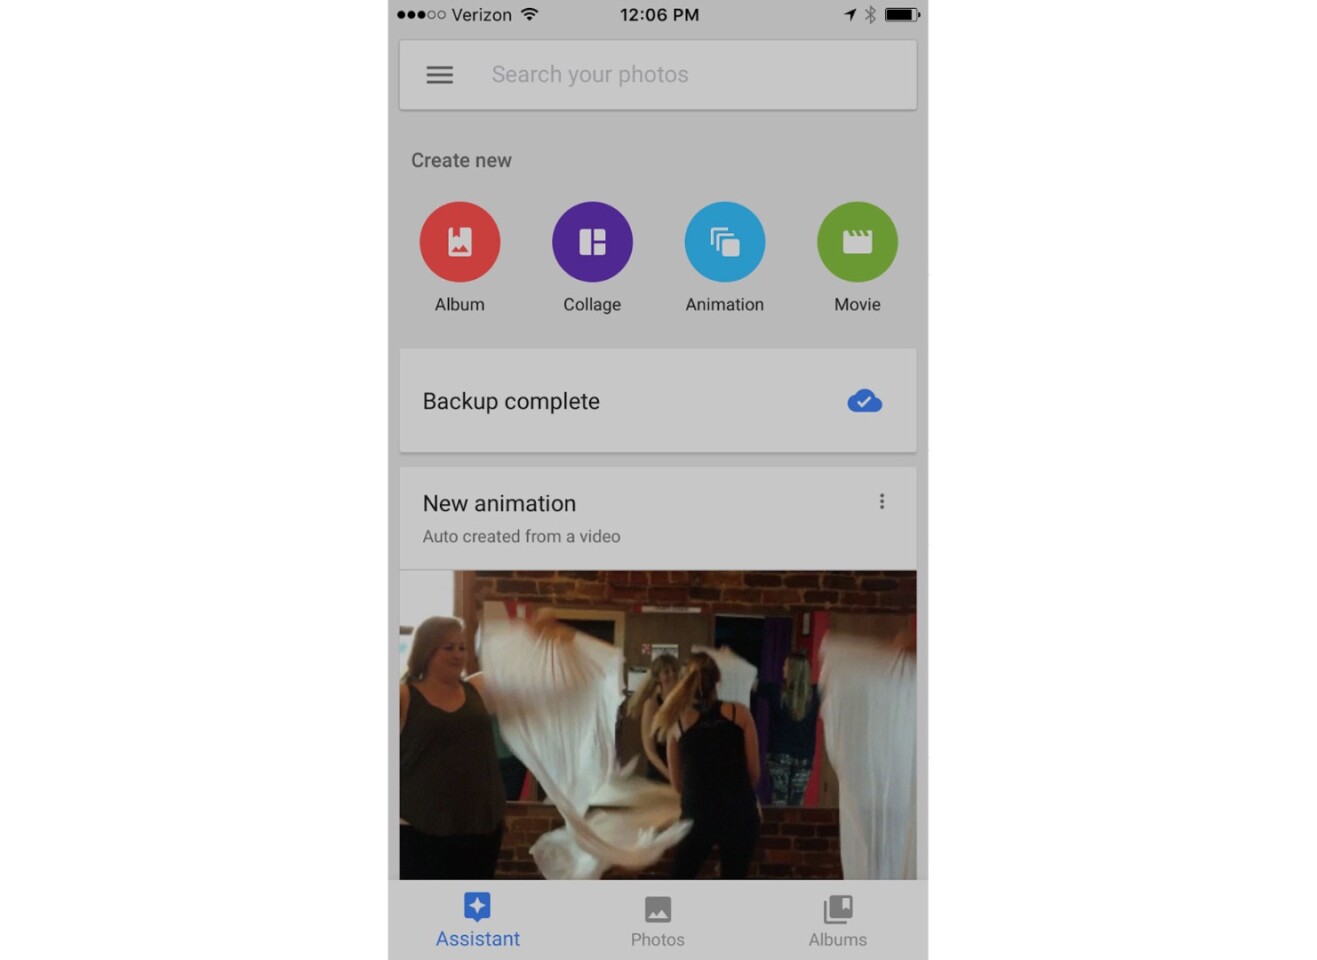
Once you're finished, it's time to familiarize yourself with the Google Photos interface. When you open the app again, you'll have access to your photo and video content through three tabs: Assistant, Photos and Albums.
Under Photos and Albums, you can peruse and organize your content. In addition, the Assistant screen has a few organizational shortcuts (Create Album, Collage, Animation, Movie, etc.) for easy searching, sharing and editing. Below, you'll see a feed of auto-created content that Google Photos generated from your photos and videos. You may see animations, edited photos, collages and more.
To access your photos from a computer, just navigate to Google Photos in your browser and sign into your account. There, you can see your content and an expanded version of the mobile interface anytime, anywhere. You can also download or share photos as needed.
Free up storage on your iOS device
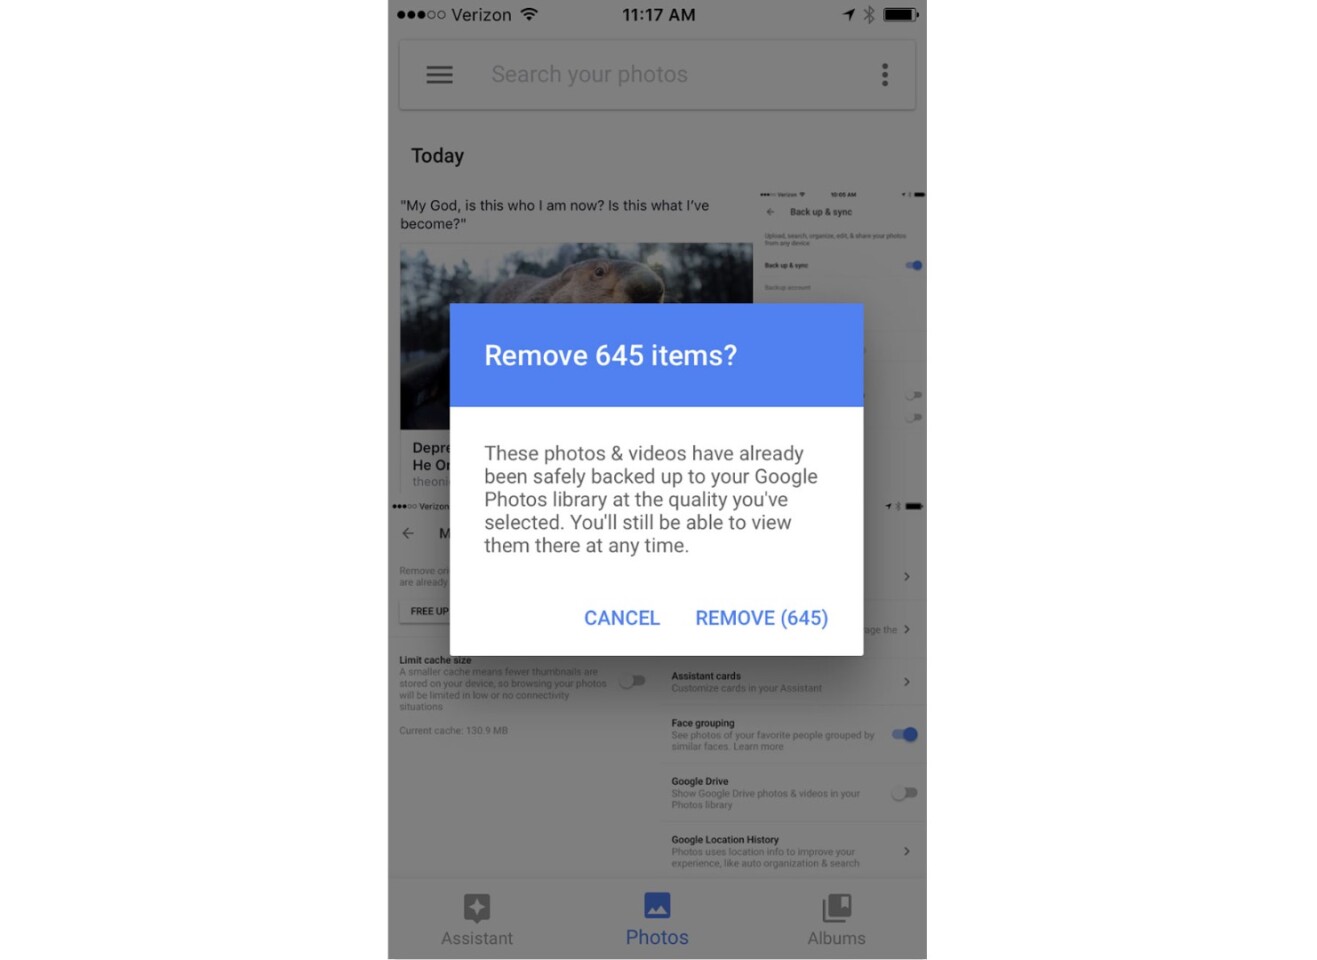
Once you're satisfied that your iOS device's photos have been uploaded to your Google Photos account, you're ready to delete them from your phone or tablet. You can either do this piecemeal through Apple's Photos app, or you can use a built-in Google Photos tool to do so all at once.
To use Google Photos, open the app and tap the three-line menu icon on the top left portion of the screen. Select "Free up space" from the menu. From there, Google Photos detects images and videos saved on your local device that have already been backed up by Google. You'll receive a notification asking to confirm the removal. Once you're ready, hit Remove.
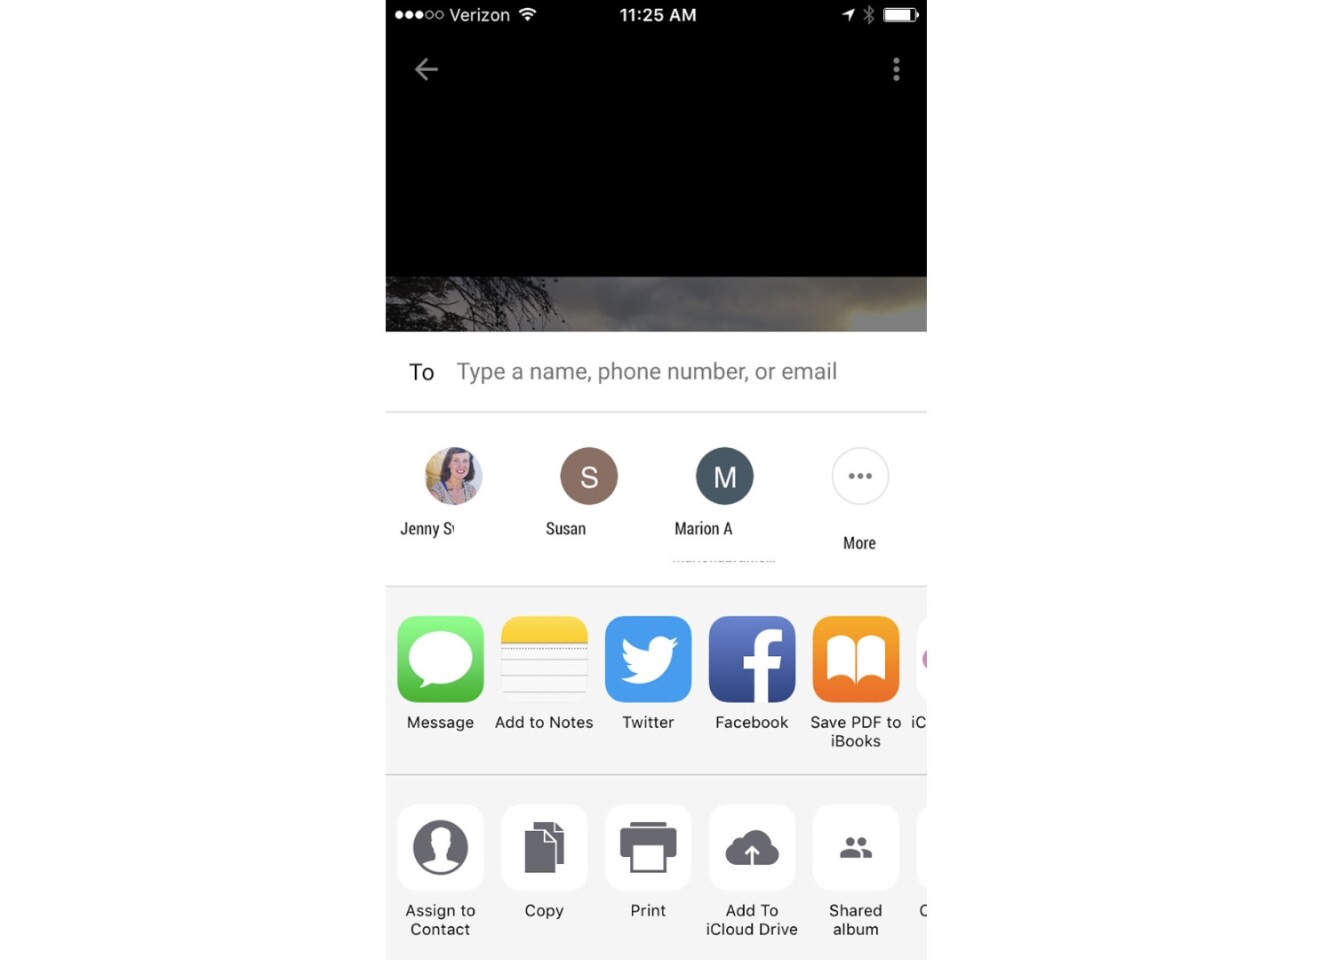
The only downside of removing these photos from your local device is that you will not be able to share or post them directly from apps like Messages, Mail or social media. However, you can do all of these directly through Google Photos: Open the app, Tap "Photos", then select the item you wish to share. Tap the square sharing icon in the lower left hand corner and make your selection.
You can also download or delete individual items from your local device on at a time. After you select the image in question, tap the three-dot menu icon in the upper right corner. If the image is already on your device, you'll see a "Delete from device" option. If it's not, you'll see "Download" instead.
Using Google Photos to replace the iCloud Photo Library
After you've uploaded your photo library to Google Photos and cleared up space on your device, you can either go back to using the built-in iOS photo library and tools, or you can use Google Photos to replace the iCloud Photo Library.
If you just want to do a one-time backup to Google Photos, then turn off the "Back up & sync" function in Google Photos. Open the app on your device, then go the Menu > Settings > Back up & sync. You can always do another backup if you run into more storage issues.
If you leave "Back up & sync" on, Google Photos automatically syncs photos from your camera roll to the cloud when you launch the app. In this way, it provides convenient cloud storage similar to the iCloud but with fewer constraints. Most notably, you'll never run out of storage, as long as you're uploading in high (rather than full) quality.
Other advantages? If you ever decide to switch to Android, it will be easy to access all of your photos on your new device. Also, Google Photos' automatic organization tools are arguably more accurate, and more fun to use, than those in Apple Photos.
If you have Google Photos continually backing up and syncing, it's safe to turn off the iCloud Photo Library on your device (Settings > Photos & Camera > iCloud Photo Library). This frees up your iCloud for essentials like device backups, so you can keep using your beloved iPhone without being subject to Apple's stingy cloud policies.
For more iOS 10 tips, check out the following:


