Hopefully our guides to ISO, aperture and shutter speed have made those photographic terms a little less daunting than they once were. If you now feel like you understand those concepts and are already comfortable trying out the semi-automatic modes on your camera, it might be time to go for full manual mode. Here we'll look at the idea of the exposure triangle, and how understanding it can make it easier when you first start shooting in manual.
Before we start, it's important to note that the exposure triangle is not intended as a technical tool. For example, it's not going to help you calculate the perfect camera settings for a given situation; that's always going to depend on what sort of photo the person behind the camera wants to take, and no triangle can know that.
However, we think the exposure triangle can be a simple and effective way of understanding how ISO, aperture and shutter speed are associated, and how balancing them allows photographers to create images with the characteristics they want. It's a good way for photographers who are just starting out with manual modes to understand what's happening when one setting is changed, and how other adjustments necessary to control exposure are intertwined.
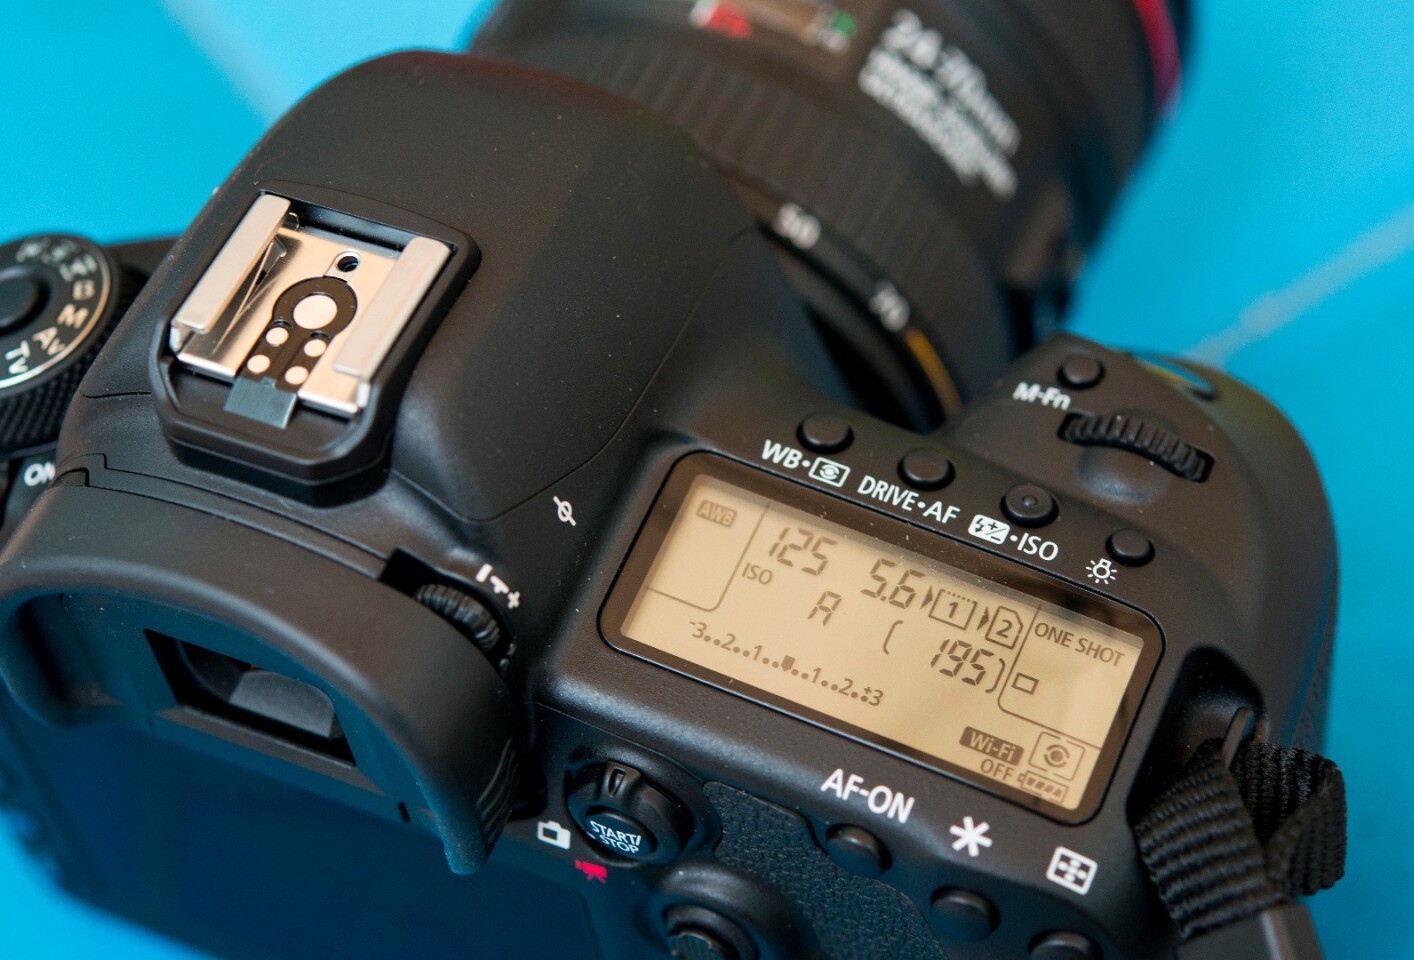
In case you're jumping in here, we'll start off with a brief explanation of the three key settings, though we'd recommend you taking a gander at the more in-depth articles.
Aperture


Aperture controls the amount of light which reaches the sensor of your camera by adjusting the size of an opening in the lens. The wider the size of the hole (represented by a smaller F-number) the more light you get in your image, but this also reduces the depth-of-field (the area of focus) in your images. For more detail, check out our guide to aperture.
Shutter Speed
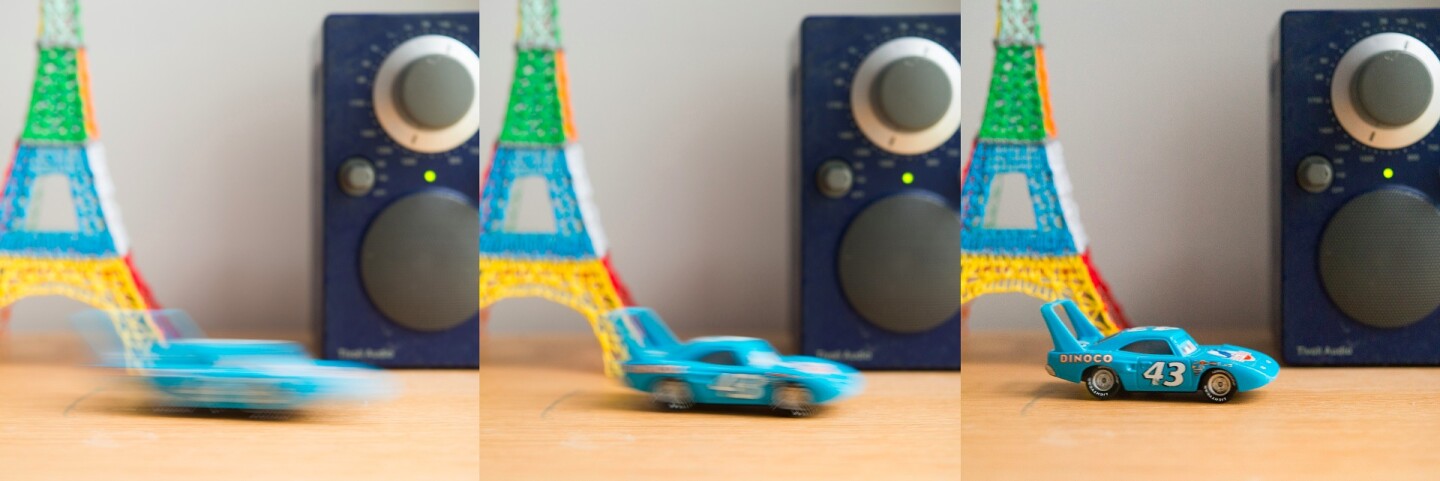
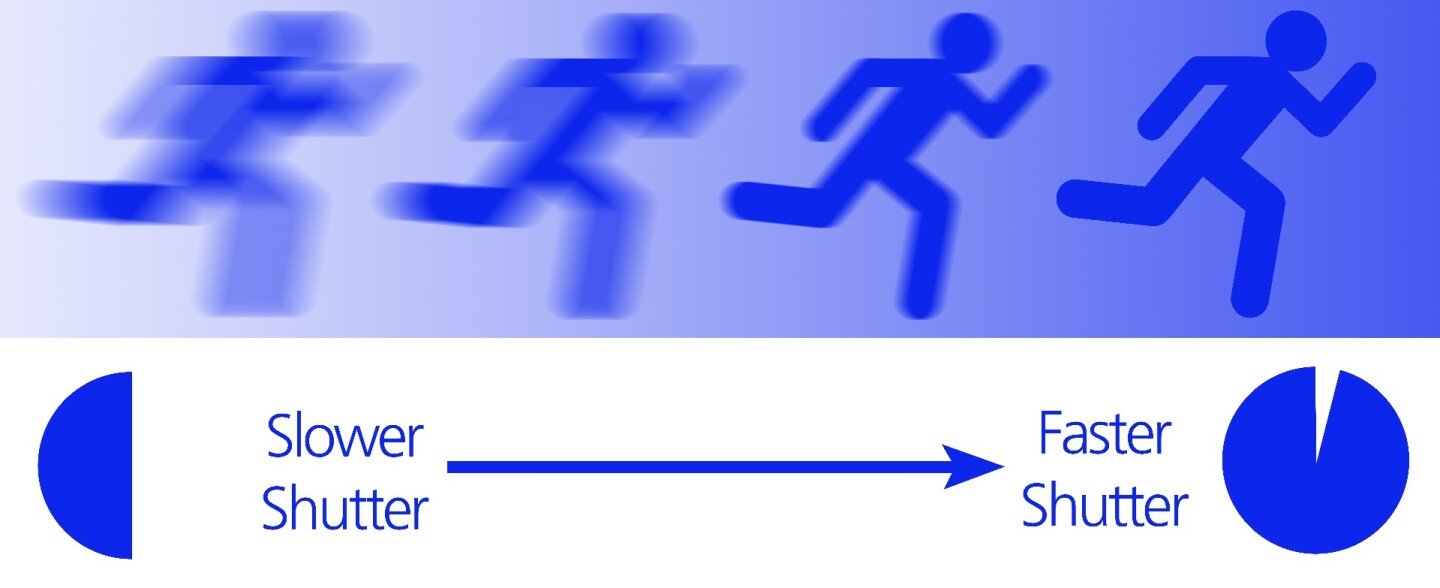
Slower shutter speeds allow more light to reach your camera's sensor, giving brighter images, while faster settings result in darker photos. However, your setting will often be determined by your subject and how you want to shoot it, such as freezing movement or highlighting motion blur. For more detail, check out our guide to shutter speed.
ISO
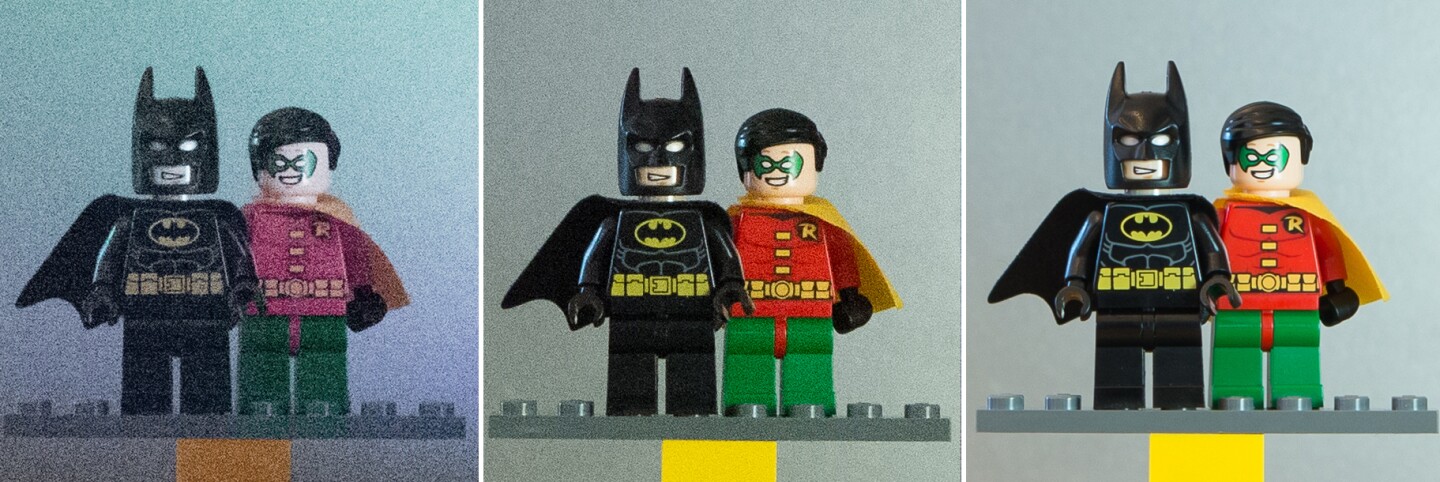

Changing ISO is another way of adjusting the brightness of your images, this time by making the sensor more or less sensitive. Lower ISO numbers mean photos will be darker, while higher ISO settings give brighter images. However, high ISO settings also mean photos will suffer image noise and reduced dynamic range. For more detail, check out our guide to ISO.
Exposure Triangle
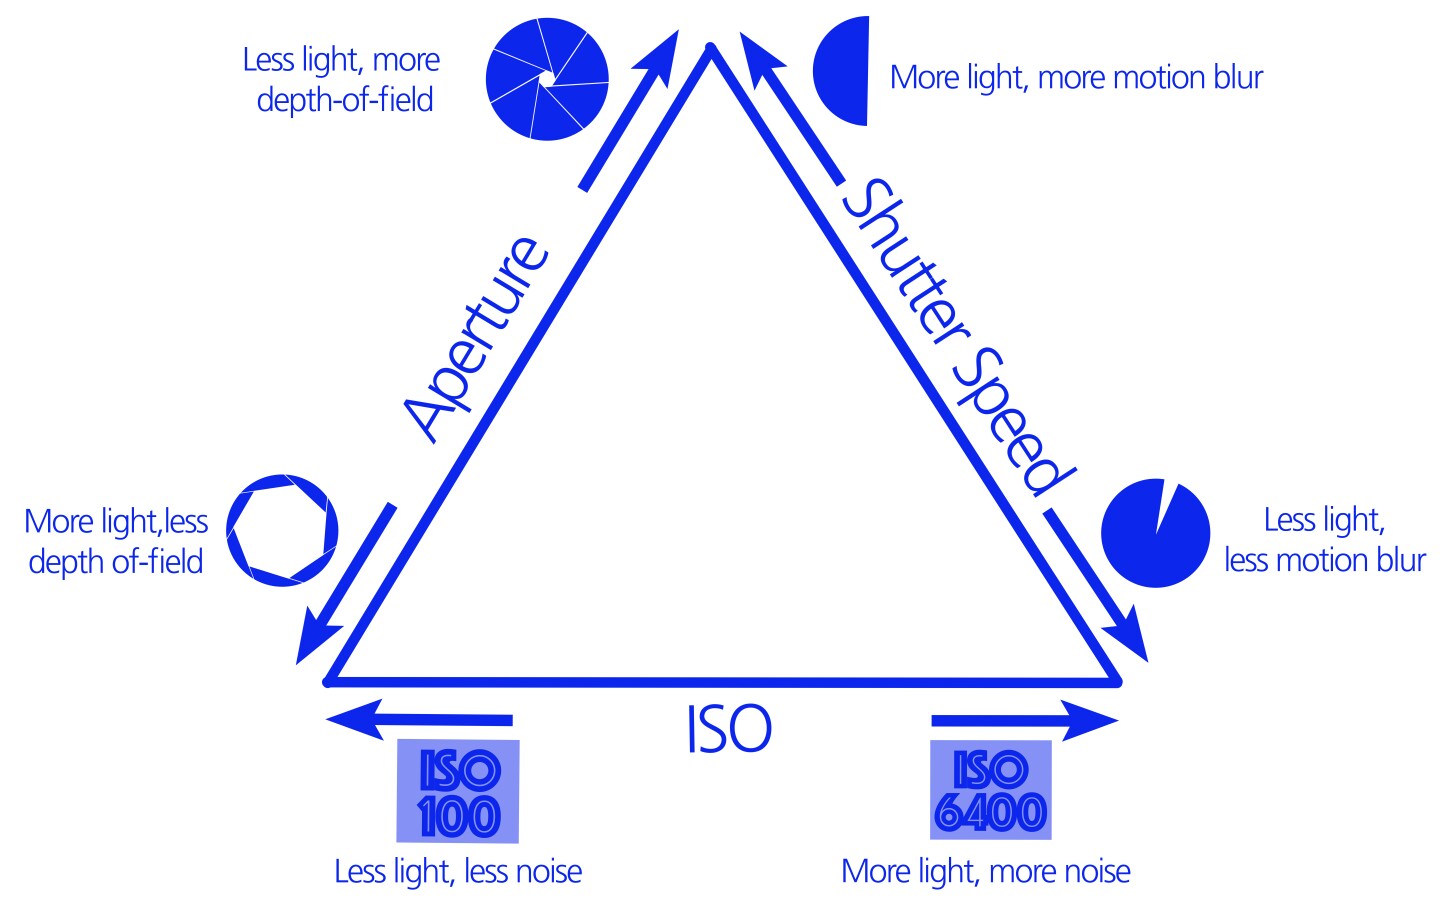
Once you understand each of these settings on their own, it's time to begin putting it all together to see how they interact with each other. Because each setting changes the brightness of your image exposure, they are all connected. As we observed when we looked at the settings individually, we know that whether you're adjusting shutter speed, aperture or ISO, a one-stop change can double or half the amount of light taken in during a photo.
Adjustments in one setting will allow/restrict subsequent settings in order to maintain an image with the exposure (brightness of the image) you are going for. This means that it's relatively straightforward to balance adjustments. For example, if you need to shoot with a wider aperture to get a narrower depth-of-field, your lens will let in more light, so to keep the exposure the same, you need to adjust shutter speed or aperture by the same number of stops.
The exposure triangle is best seen as a simple reminder of this relationship. It allows you to quickly visualize how making a change to one setting will make an image brighter or darker, and how that will need to be balanced with the other two settings. If you want to change one setting to give more light, you need to balance this with a settings change which will let in less light. Equally, if you want to change a setting which will result in less light, you need to increase it by adjusting one or both of the other settings.
While automatic and semi-automatic modes take care of this for you, in manual mode you are in total control. This means you can approach taking a photograph by selecting settings based on how you want your photo to look – such as a specific shutter speed to control motion, or aperture to set depth-of-field – and then balance the other two settings to ensure the right exposure.
Examples
Here we'll look at a few photographs, and how an understanding of the exposure triangle helped us come to the aperture, shutter speed and ISO settings we used.

When taking this photo of quick-moving cyclists, we knew we needed both a fast enough shutter speed to freeze the action and a wide enough aperture to ensure that multiple cyclists were in focus. It needed a shutter speed of 1/600 sec to freeze the action, so we balanced this with an aperture of F8 and then upped the ISO to 1600 to let in more light.
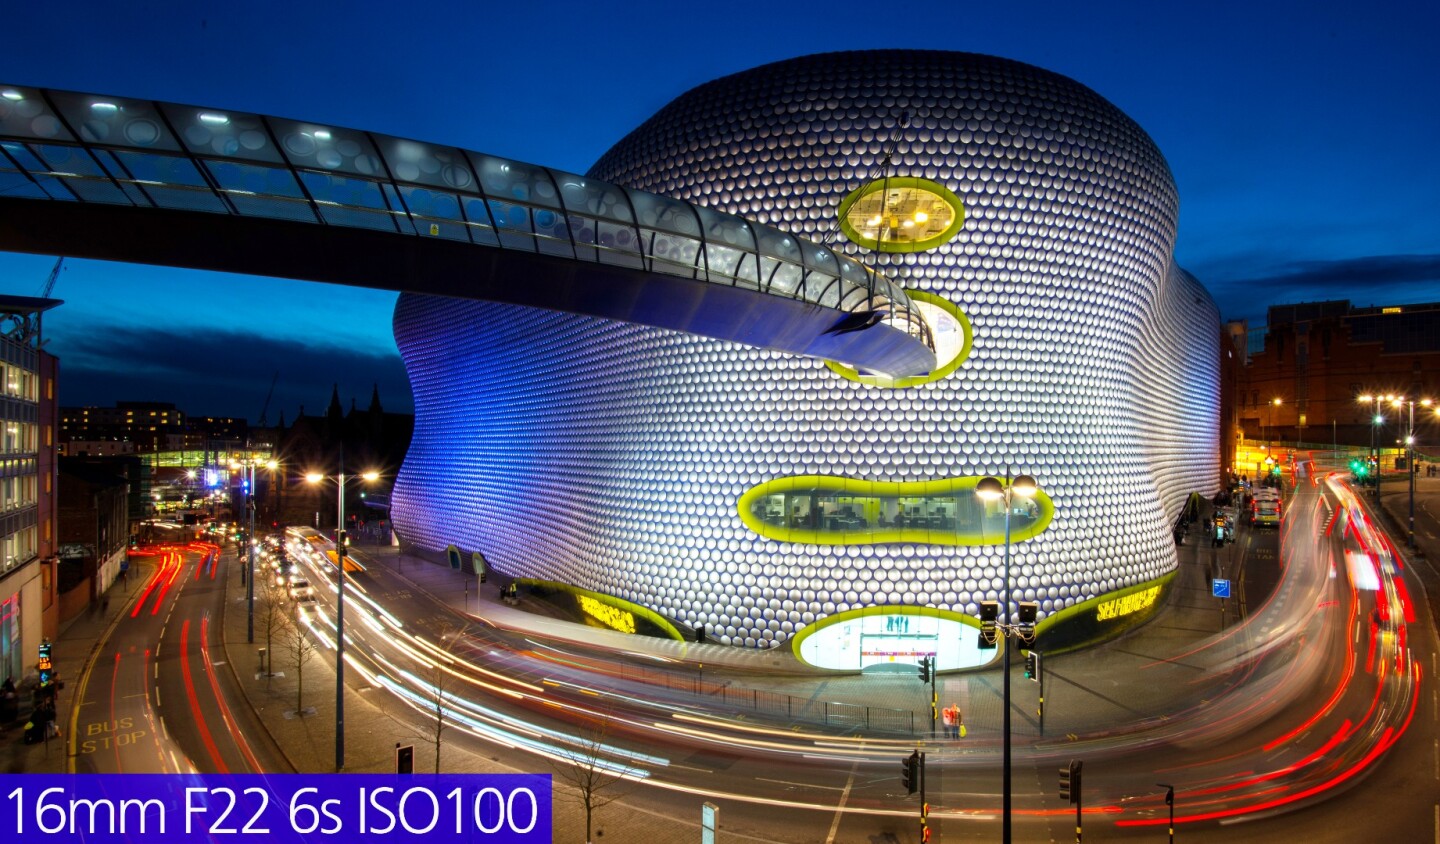
In this shot we wanted to turn the lights on the passing traffic into light trails and worked out that a six-second exposure would be needed to achieve this. Because we also wanted to keep the ISO as low as possible to reduce noise, we settled on a narrow F22 aperture which also gives the image a very wide depth-of-field.
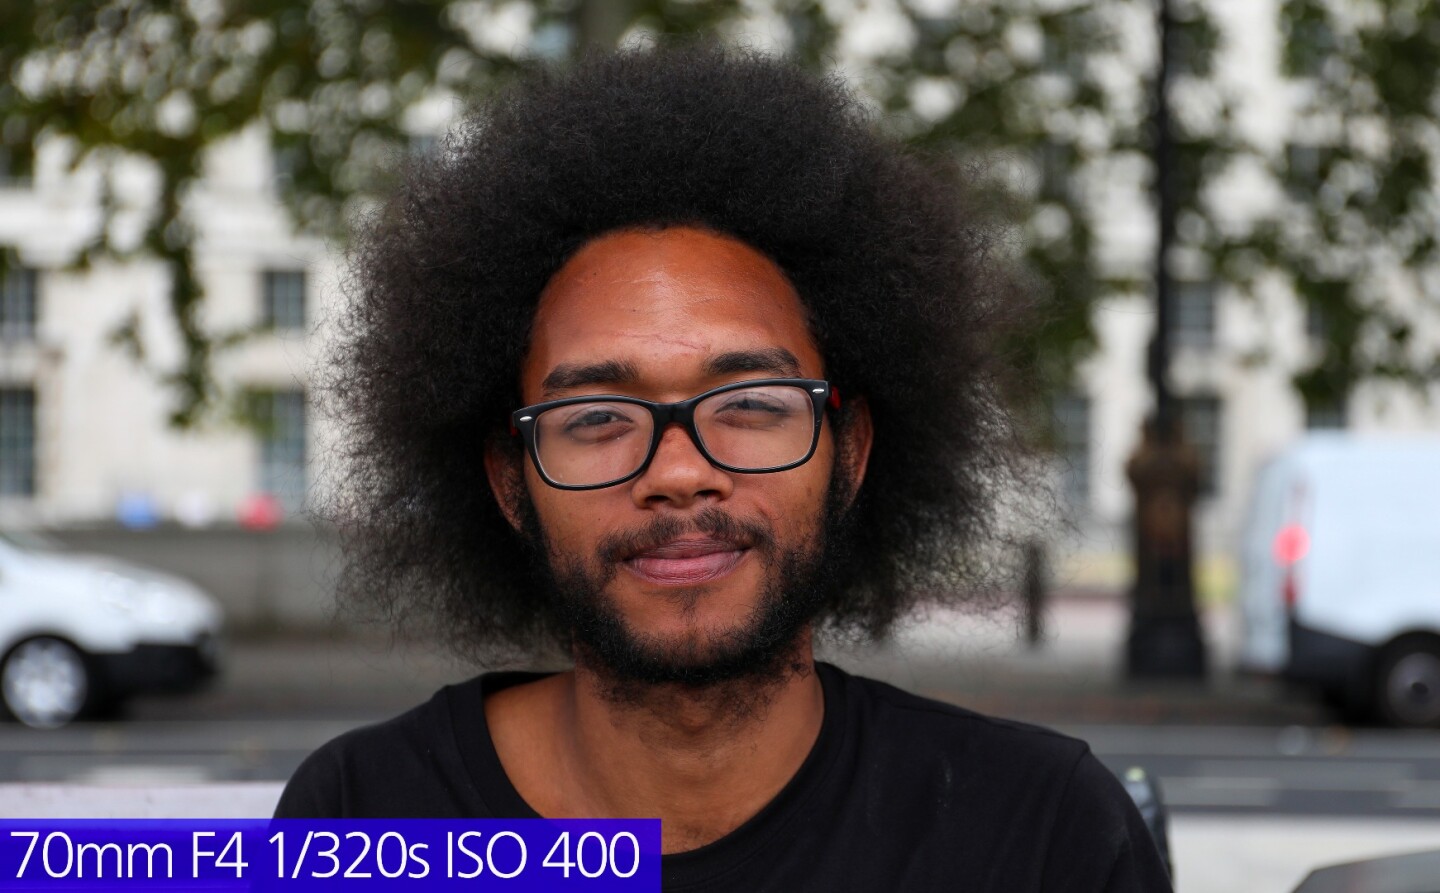
When we took this quick portrait, we were using a lens with a maximum aperture of F4, and because we wanted a shallow depth-of-field we shot at that opening to isolate the subject from the background. While we had a shutter speed of 1/320 sec, and an ISO of 400, we could probably have used a lower ISO (to reduce noise) and then balanced the reduced light with a slower shutter speed. As the subject was stationary we didn't need to be shooting at 1/320 sec to keep things blur-free.
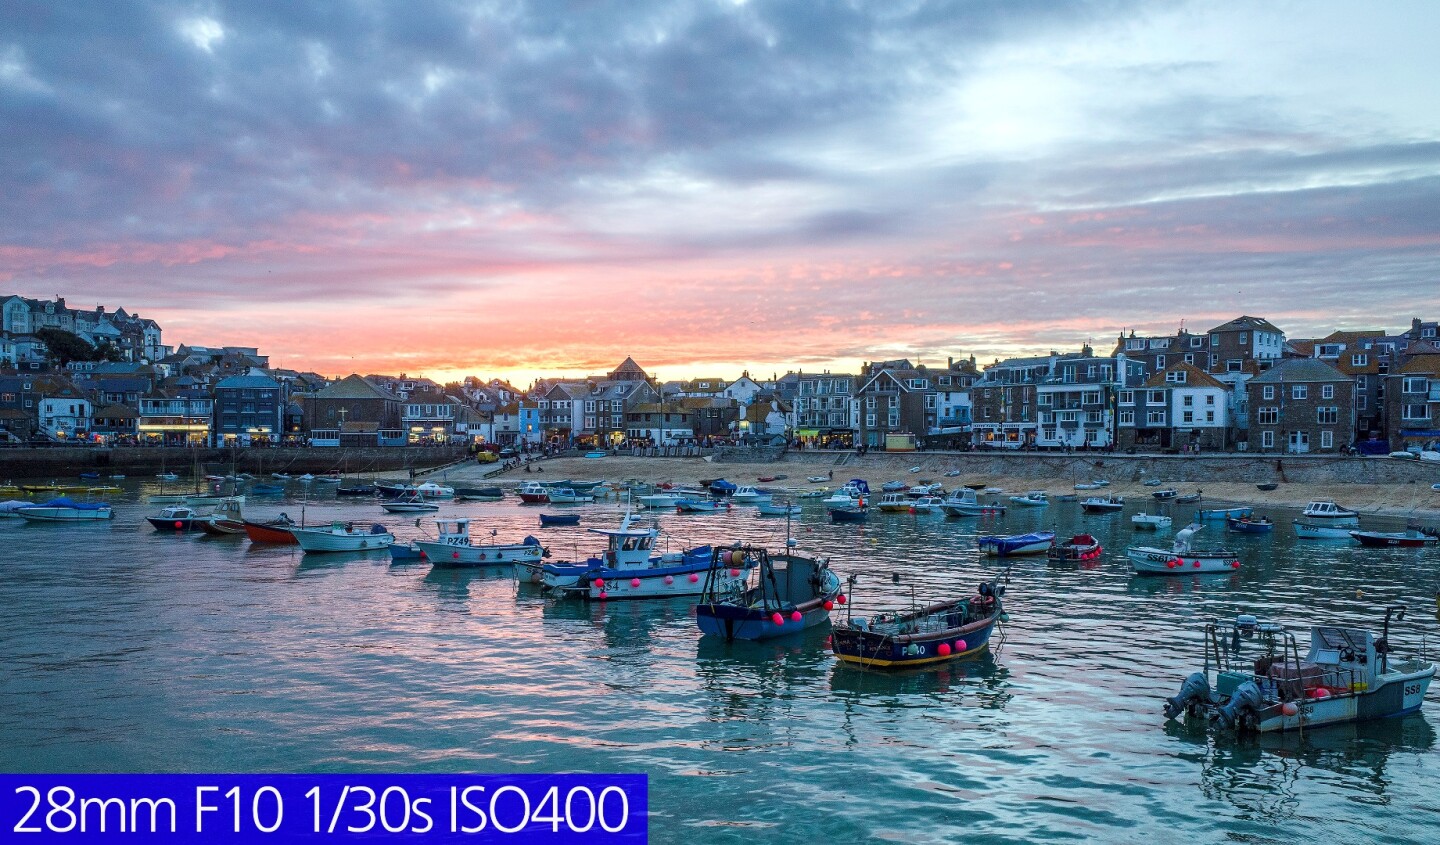
In this picture we wanted to shoot with a narrow aperture to give a wide depth-of-field and settled on F10. We also wanted to keep the ISO level as low as possible. However, because we were not using a tripod, and the boats were moving on the water, we couldn't use a slow enough shutter speed to allow us to use ISO 100. In the end we settled on 1/30 sec and ISO 400, as this allowed hand-holding the camera and keeping the image sharp, while not introducing too much image noise.

For this shot we wanted to select an aperture which would keep just over one macaroon width in focus, which turned out to be F3.5. Once this was set, we balanced a fast shutter speed and medium ISO level to a point that we could eliminate any blur from camera shake.
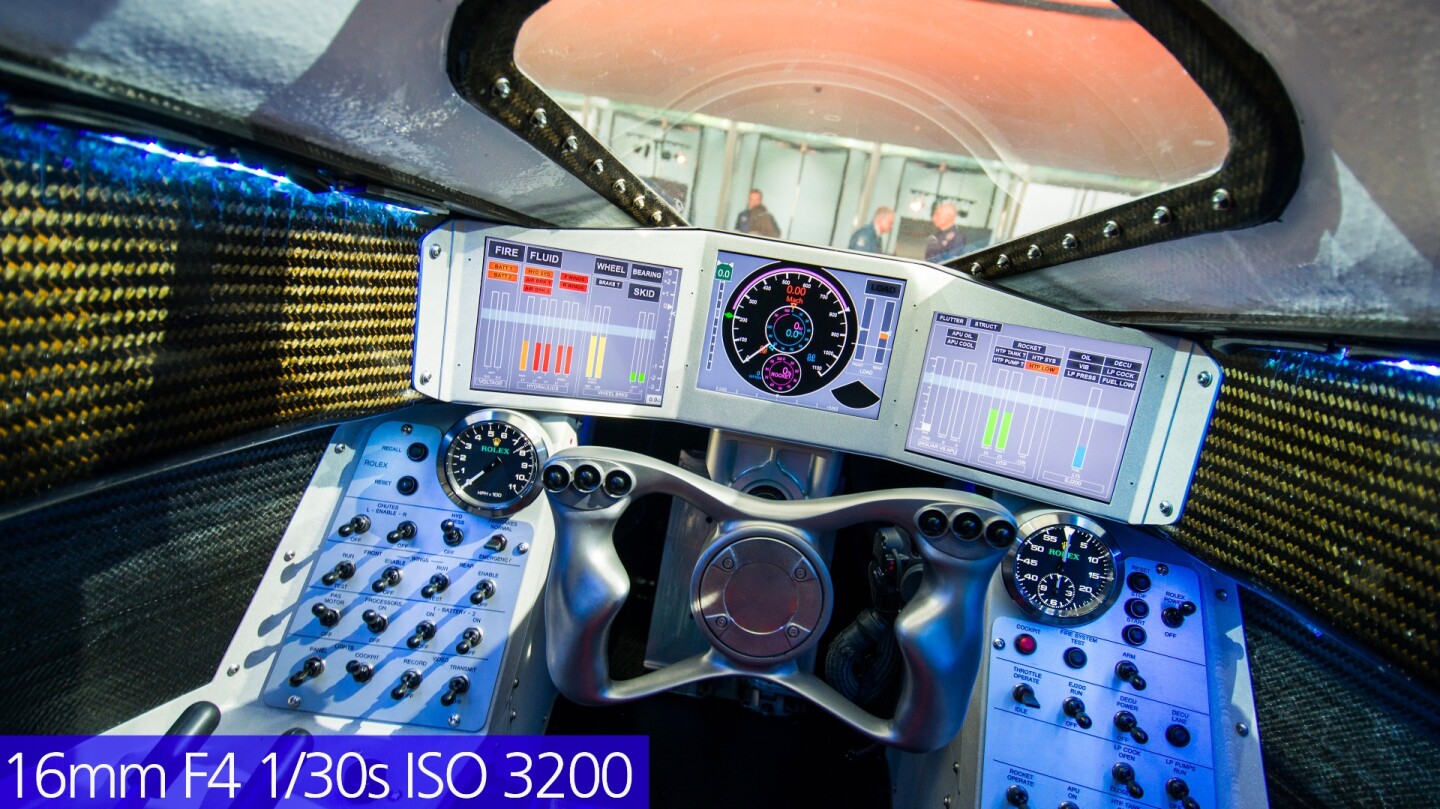
This shot was another example of photographic compromise. Trying to get an interior shot of the dark Bloodhound Supersonic Car cockpit meant dangling our camera in one hand, and the only lens we had which was wide enough maxed out at an F4 aperture. This again meant balancing a shutter speed which was slow enough to let in light, but fast enough to keep things sharp, with an increased ISO. If we'd increased the ISO above the 3200 we shot at, the level of noise would have increased too much.
Summary
Hopefully this article has helped you understand how to put the key manual control settings together, and given you the confidence to give it a try. One of the pleasures of shooting digital is that you can make settings adjustments between shots and instantly see how they impact your images. If you are reviewing your images later, it's also handy to remember that your settings are recorded in the EXIF data, so you can see what worked, and what didn't.
If you don't think you are quite ready to go full manual at the moment, why not start out with some of the semi-automatic modes we looked at in our guide to camera modes, and if you're not quite sure what controls you need to use to change these settings, you might want to look at your camera manual or, better yet, our guide to what all the buttons and dials do on your camera.