Just like with previous versions, once you've had your Windows 8 computer for a while, chances are it will become unstable or not be as sprightly as it once was. That's when a little clean up might be on order to return it to its former glory. Here's how to use the PC Refresh feature to reclaim the speed and stability the computer once had and not lose your personal files. This article will also show you how to make PC Refresh (and Reset) work if you receive a common error message.
PC Refresh and Reset has been available since the first release of Windows 8, but it has changed since Windows 8.1 and the more recent Windows 8.1 update 1.
Note: There is a big difference between a PC Refresh and PC Reset. The latter will restore your PC to factory settings, which will also delete all of your personal files and apps. I suggest doing the PC Refresh for getting speed and stability back to your computer while retaining your personal files. However, If your computer is badly infected or you're selling it, then a PC Reset would be in order.
Getting to either PC Refresh or PC Reset is exactly the same. The only difference is with one you keep your personal files, while the other wipes your machine clean.
Why is PC Refresh valuable?
Inevitably, your Windows system will slow down over time in comparison to when you first got it. Everyday use and installing and uninstalling apps will leave remnants of those programs and files in temporary directories and the Registry, which causes stability and performance problems. If you've been hit by malicious software, uninstalling it can also lead to corrupted files that results in a slow and unstable computer.
The best solution to this type of slow down or instability in previous versions of Windows was to do a clean install of the OS, which is a long and arduous process. And who has the time? Now, in Windows 8, there’s a feature that lets you Refresh or Reset your PC without going through the hassle of a clean install.
Refresh your Windows 8 computer
To refresh your Windows 8.x system, go to Settings > Update and Recovery > Recovery. Then under "Refresh your PC without affecting your files," click the Get started button. Or if you do want to do a PC Reset, click the Get Started button under "Remove everything and reinstall Windows." We'll take the first option.
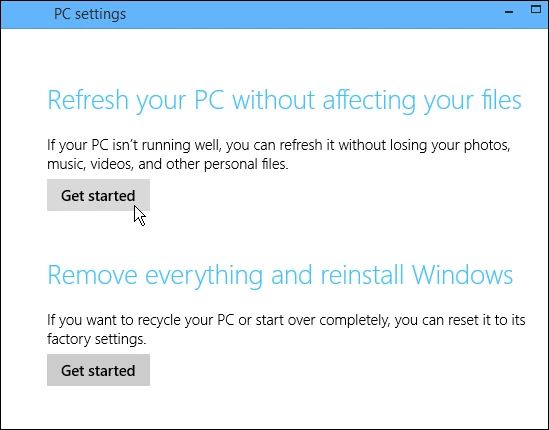
Next you should see the following message letting you know what will happen during the PC Refresh.

Now wait while your computer restarts a couple of times and the PC Refresh completes. You'll see a series of different screens, like the one below, where Windows lets you know where it's at in the refresh process. In my experience, it usually takes about 30 minutes, but the time will vary between systems.
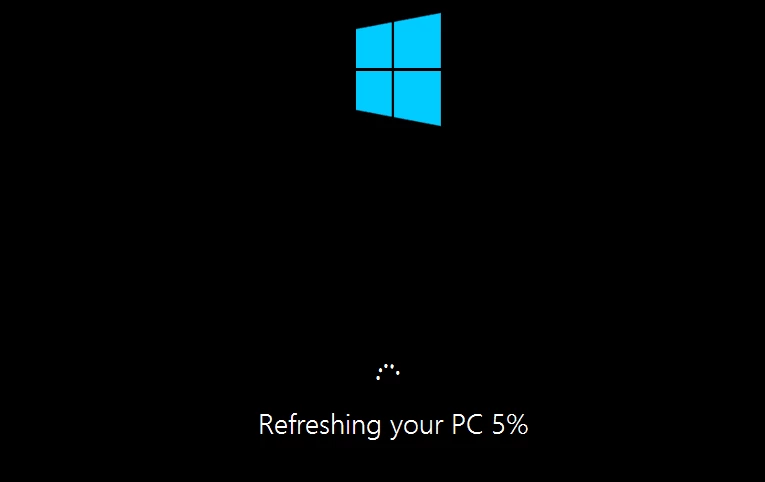
Keep in mind that after the refresh is complete, you'll need to do some system configuration to get everything back to how you had it. For example, you'll need to set up and reconfigure some desktop programs like iTunes or Google Chrome, reset file associations, desktop shortcuts, etc. While that's a bit annoying, the important thing is your personal files, such as photos, music, Office documents, videos, etc., are still there.
Troubleshooting PC Refresh/Reset
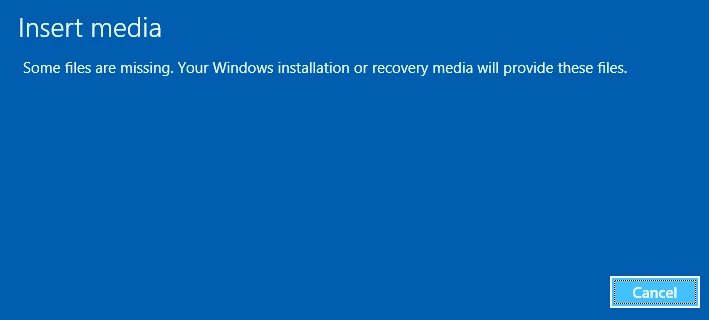
If the above instructions didn't work and you receive the error message: "some files are missing. Your Windows installation or recovery media will provide these files" shown above, you'll need to do some geeky stuff. This is a common error if you updated Windows 8 to 8.1 via the Windows Store. Microsoft didn't include the proper image file to do a PC Refresh and the ability to do a PC Refresh or PC Reset is no longer there.
Microsoft advises that you need the ISO file of Windows 8.1, but that wasn't made available right away, and a lot of people aren't able to use their original Windows 8 key to download it. The good thing is, you can create the proper image file, but it takes some time and patience.
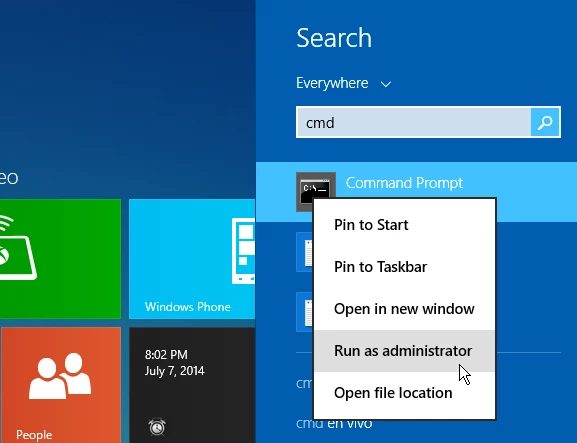
Before you start, make sure your computer has at least 16 GB of free space available on the hard drive. Then you'll need to run the command prompt as administrator. This is essential, otherwise creating the image won't work.
Right-click on the Windows button from the desktop and select Command Prompt (Admin) from the menu. Alternately you can search for cmd in the Modern environment, then under the results right-click Command Prompt and select to run as administrator.
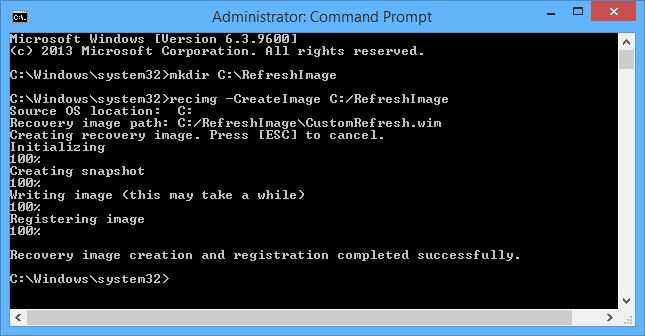
Then type in the following commands in succession:
mkdir C:\RefreshImage and hit Enter.
recimg -CreateImage C:\RefreshImage and hit Enter.
When you're done, the command prompt should look like the screen shot below. Windows first creates a snapshot of the recovery image and, after it's created, Windows starts writing the recovery image.
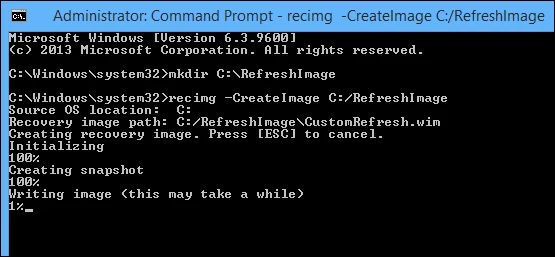
It can take several hours for Windows to write the recovery image depending on your computer's hardware. When everything is complete, the command prompt will look like the shot below.
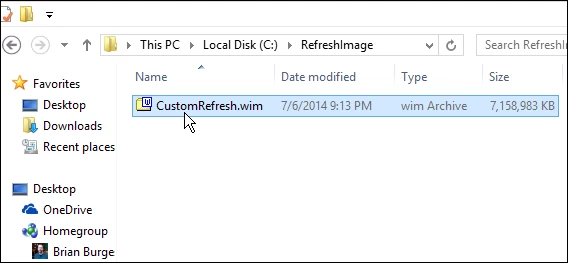
To verify the image creation was successful, navigate to the directory you created, C:\Refreshimage and you'll see the image file stored there.
Now you can go back and run PC Refresh or PC Reset as shown in the steps above and everything should work just fine.
Summing up
If your computer came with Windows 8.1 or 8.1 update 1 pre-installed, the first method shown above should work exactly as described. There are some other ways you can get the Windows 8.1 ISO, but that requires some goofy work arounds and those steps are even more convoluted and time consuming. Plus, you would need to make an installation disc or flash drive image from the ISO anyway. So, even though making the image file via the command line seems to be a hassle, it could be worse.
Of course, with anything tech, something could go wrong, so you'll definitely want to make sure you have a solid backup strategy. A good backup plan is to store your files to cloud services like OneDrive or Google Drive and have an on-site backup to an external drive, server, or NAS. It's also a good idea to make sure everything is being backed up to an off-site location using services like CrashPlan or Backblaze.
Now enjoy your revitalized PC.


