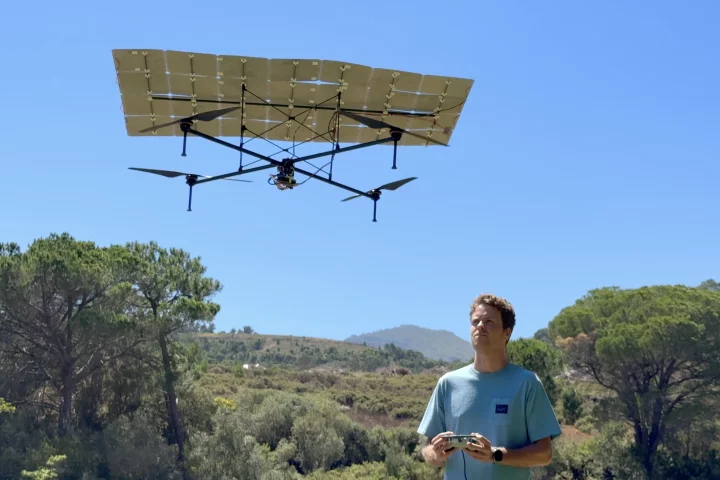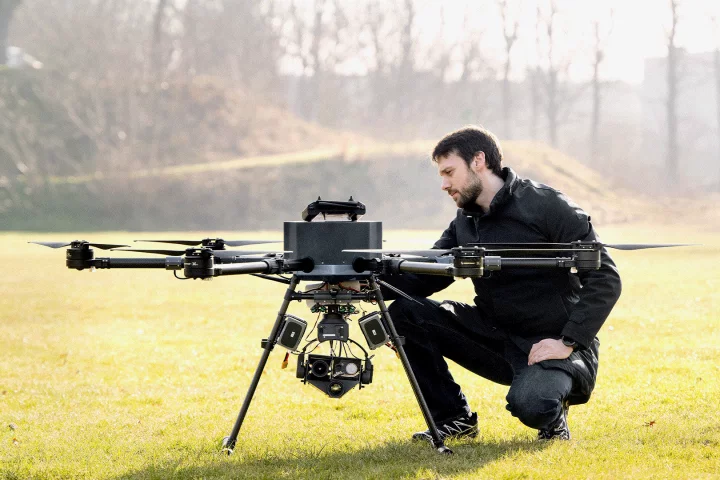

In Drone School 1 we looked at how to choose a good beginner quadcopter. Now it's time to take a look at your quadcopter controller. In Drone School 2 we look at transmitter modes 1 and 2, different flight modes you might encounter, trim controls and what the two main sticks do.
Transmitter modes
Most transmitters, even for small, cheap drones, offer at least two control modes, mode 1 and mode 2. These map the control sticks in different ways - see the diagrams below.
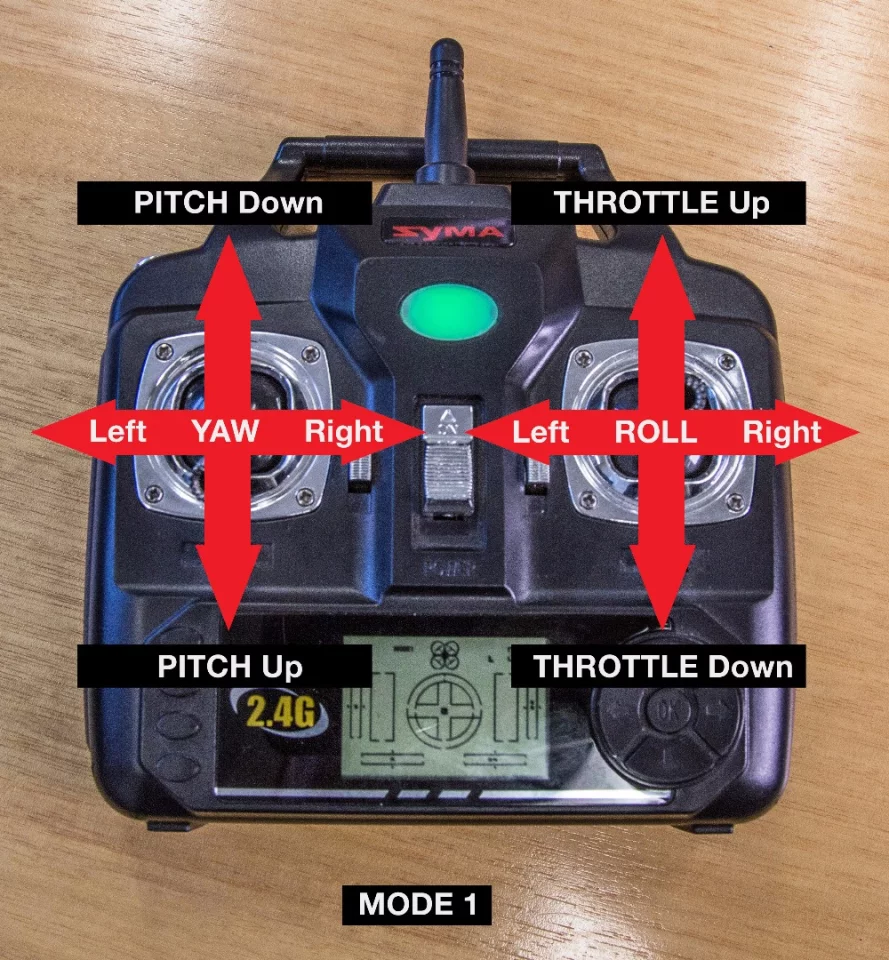
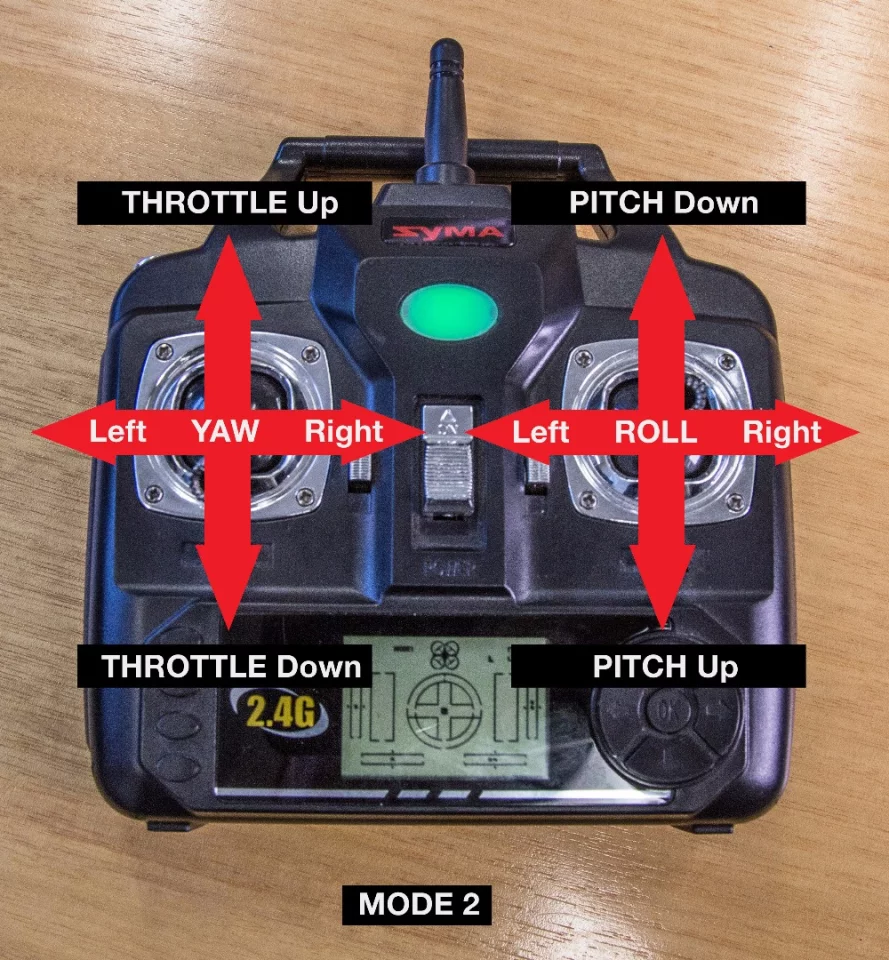
The vast majority of quadcopter pilots stick with mode 2, which makes the left stick control throttle and yaw, and the right stick control tilt and movement. We'll assume from this point on that you're using mode 2.
Flight modes
Some transmitters also enable different flight modes. Here's some you might come across and what they mean:
Standard: self stabilizes to sit horizontally when the sticks are released. Maximum tilt is limited. Also known as low rate, or Attitude, or atti, or just A mode.
Advanced: as above, but the maximum tilt is increased, allowing significantly faster flight. A quick way for beginners to see how the drone interfaces with walls, windows and pot plants at speed. Also known as high rate or expert mode.
Manual: turns off all stabilization, and does not limit the maximum tilt. This is also known as acro, agility or stunt mode, and allows full inversion. This is the mode you should quietly put your friend's quadcopter in if you don't want him to have a quadcopter anymore. Otherwise, steer clear until you're very confident.
3D mode: completely unstabilized, plus the throttle is mapped such that leaving the throttle at 50 percent stops the motors, pushing it forward develops positive thrust, and pulling it back towards you develops negative thrust. This lets expert pilots fly the drone upside down, and helps beginners to crash into the ground at higher speeds than gravity can accommodate.
GPS mode (also known as P mode): similar to Attitude mode, but only available on GPS-enabled drones. This mode self-stabilizes to sit horizontally when sticks are released, but also uses GPS to hover in place and correct for wind gusts. Some quads like the DJI Phantom 3 include additional downward facing cameras for even more precise hover stability.
Intelligent Orientation Control modes: only available on certain GPS or compass-enabled drones, IOC modes like course lock take the guesswork out of orientation by controlling the quad such that forward and backward are mapped to certain compass directions instead of whichever way the drone is pointing. There's also home lock, a similar mode that maps the backward direction to always fly back towards the takeoff point. Headless mode appears on some cheaper drones, and uses compass readings in the aircraft and the transmitter so the drone responds relative to the direction the controller is pointed in.
While you're getting started, you should set your drone to Standard mode, or GPS mode if you've got it.
Trim controls
Some transmitters give you the ability to trim the inputs from your control sticks. Trimming basically means adding or subtracting a little input from one stick or the other to correct an imbalance.

For example, your quad might not sit perfectly level when it self-stabilizes due to a problem with the internal gyroscope. In this situation you might use trim to correct it by adding a little trim to the right stick in the opposite direction to the tilt you're experiencing.
Any trim adjustments should be made indoors where wind will not interfere, and you should make sure you're taking off from a level surface.
The sticks*
*Assuming you're flying Mode 2
Left stick: Y-axis (forward and back)
This is your throttle. Push forward to speed up the props and rise, or pull back to slow the props and bring it down. Some throttle sticks will spring back into a central position that should hover at a constant altitude, others move freely and require you to manage the throttle at all times.
Left stick: X-axis (left and right)
This controls yaw, or which way the front of the drone is pointing, you can think of it like the rudder on an airplane or boat. Moving the stick left rotates the drone anti-clockwise (looking down from on top) and right is clockwise.
How does yaw control work? Multicopters generally use an even number of propellers, half of which spin clockwise and half of which spin counter-clockwise. The yaw control speeds up the props spinning in one direction and slows the others, maintaining altitude and taking advantage of the torque effect to turn the drone left and right.
Right stick:
The right stick controls the tilt of the drone, and thus the horizontal movement. In aeronautical terms, forward/rear tilt is called pitch, and left/right tilt is called roll – but the distinction is a little less important with a multicopter that can move in any direction.
Pushing forward on the right stick adds extra lift at the rear of the drone, tilting it forward and accelerating it forward. This works whichever way you push the stick, including diagonals.
Here's the trouble: remember that yaw control that changes which way the front is pointing? Pushing the right stick forward accelerates the drone forward according to which way the drone's pointing, not which way you're looking. The orientation of the drone completely changes the effect of that right stick.
The lights
We'll do some exercises in Drone School 4 to help you get your head around that orientation business, but for your first few flights you're going to want to try to keep yourself facing the same way as the drone so that right stick makes more sense.

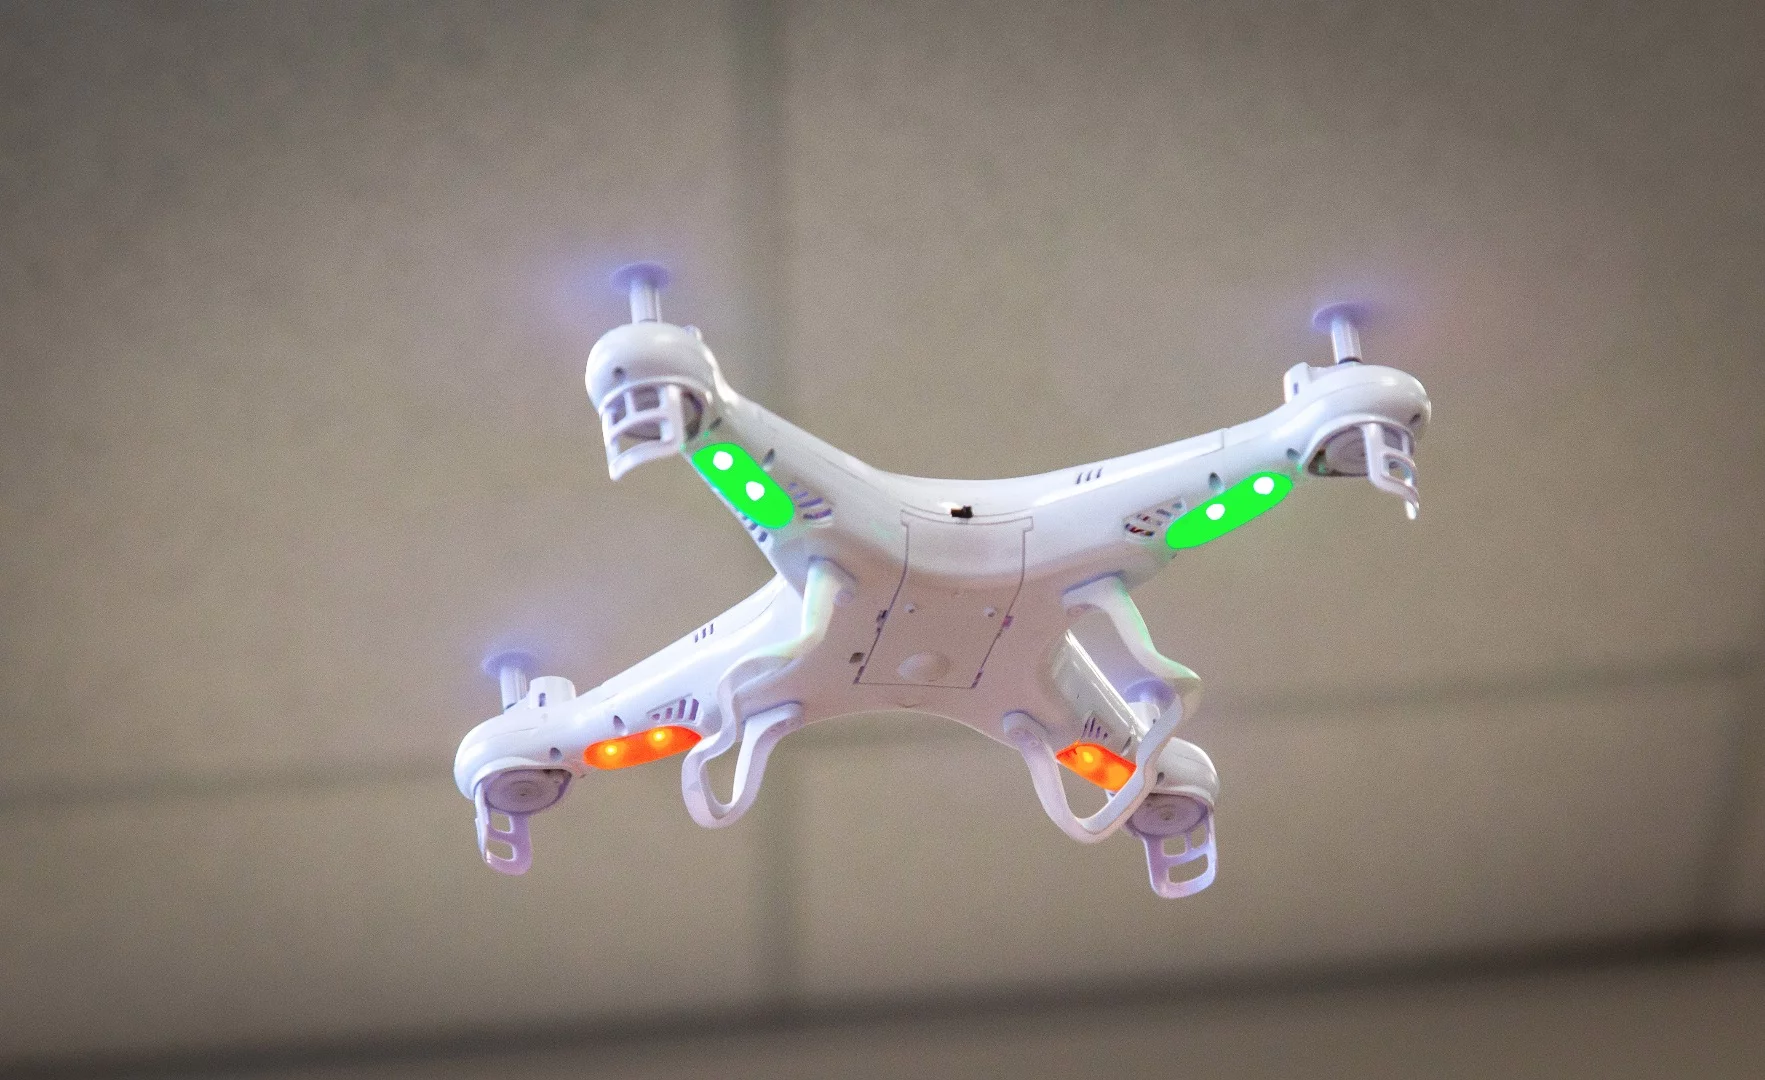
Most drones have lights that help you with this. On the Syma X5 (above), the orange lights are the forward lights and the green lights are the tail – so if you keep the greens facing toward you, you're golden!
Next lesson – Drone School 3: Your first quadcopter flight