Have you ever wondered what that USB port on your Wi-Fi router is for? Most modern routers have at least one or maybe two, and today we'll take a look at how Windows users can set it up with a hard or flash drive to share content across a local network.
Note: For this article I'm using a Cisco Linksys E4200 Wi-Fi router. The interface for each router manufacturer will, of course, vary, and have different options for sharing the drive. Here's a look at using Windows to access the drive, which is the same process for any router with a connected USB drive, despite its internal software features.
Choose a hard or flash drive to share
The first thing you'll want to do is find a hard drive or flash drive that you want to use to hold data that you're going to share with everyone. One thing to consider before selecting a drive is to check your router's documentation to see if there are any storage limitations – certain routers do have a storage cap.Of course you'll be able to get more data at a cheaper price if you use an external hard drive. But if you only have a few things to share, then a flash drive will do. In this example I'm using a Centon 64 GB DataStick Pro.
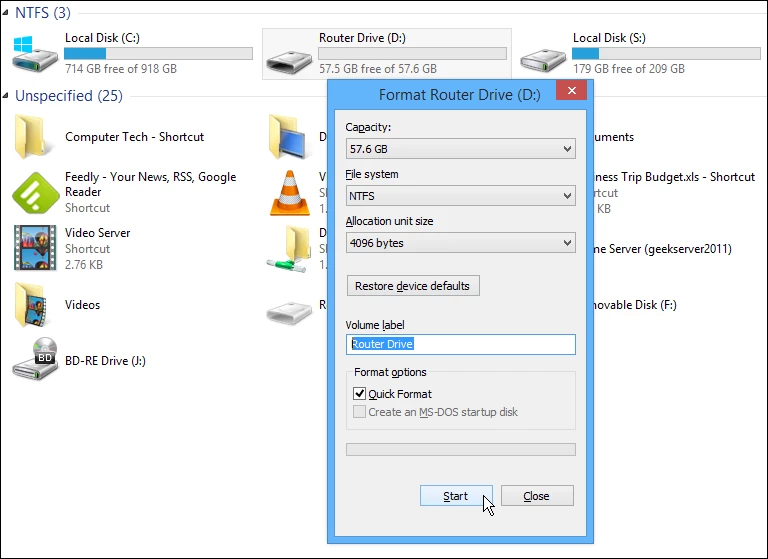
After settling on a drive, I recommend formatting it using Windows. Some routers offer the ability to format the drive using built-in software, but I've had the best luck formatting it with Windows.
To format the drive in Windows, connect it to an open USB port on your PC, find it in Computer (called This PC in Windows 8), right-click on the drive, and select Format. A quick format should do in most cases, and while you're at it, give the drive a memorable name so you know what it contains. This step isn't entirely necessary, but if you can, it's nice to start with clean gear.
Access the routerTo get to the router settings, open any browser on a computer connected to your Wi-Fi network. Then type in the appropriate IP address of the router to get into it. Usually it will be something like 192.168.1.1 – again, if you're not sure, check the router's documentation.
Then you should be asked for the router's login information. If you're still using the default settings like "admin" for both the username and password, take this opportunity to set it to something more secure. You don't want just anyone being able to access your network or the drive you add to it.
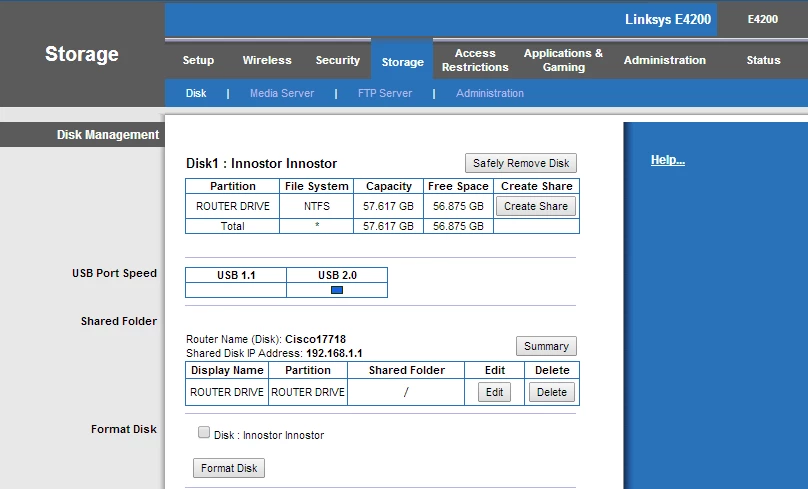
Now, in the router's settings, look for a heading called drive storage, file sharing, or something similar. There you will see the information on the drive that you connected to your router.
Access the drive connected to router
To be able to read and write to the attached drive, open the Network folder on Windows. Then clear the path at the top of Windows Explorer and enter \\ followed by the router's IP address. For example: \\192.168.1.1 as shown below. The drive will show up in Windows Explorer as a shared folder with the name you gave it. You will need to enter the router path for each computer you want to connect to the drive. If you're prompted for a username and password, use the same credentials you used to log into the router.
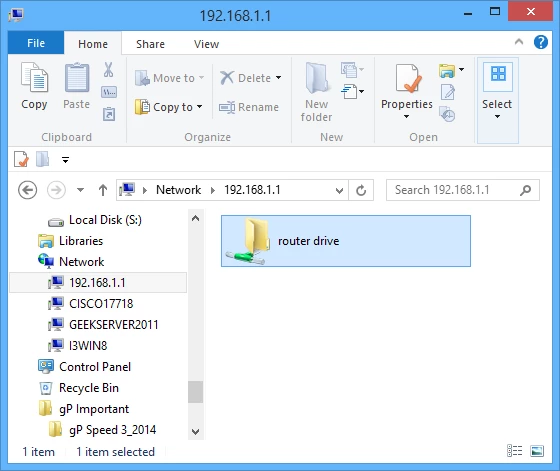
You'll be able to use the drive exactly like one connected to your PC. You can create folders, copy videos, music, documents, and more. And you can do this from any computer as long as you open Network and type in the router path address that you did in the step above.

If you're going to keep the drive attached to your router and continue to use it, you're not going to want to enter in the router path each time. To make things much easier, just map it as a network drive – it's not as complex as it sounds.
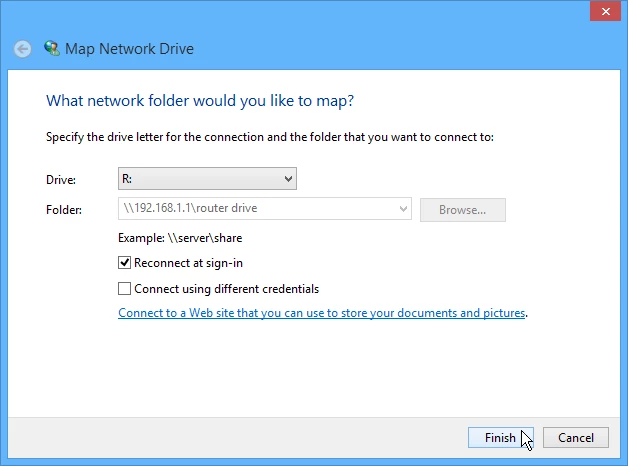
Right-click the drive and select "Map network drive" and give it a drive letter that isn't already being used, make sure "Reconnect at sign-in" is checked, then click Finish. After that, any time you restart and connect your desktop or laptop computer to the network, the drive connected to the router will appear.
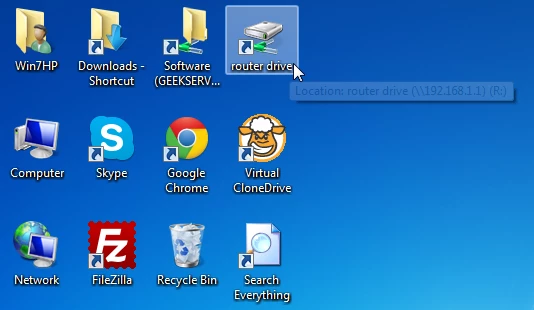
Also, if you want easier access to the drive, you can create a shortcut on the desktop.
Remember that everyone connected to your Wi-Fi network will be able to access that drive (provided you've mapped it on all systems), so make sure you aren't putting anything too sensitive on it. This is a great solution for families who want to share music, videos, and photos among all computers in the house. It provides yet another way to back up your data, too.


